Sewing projects have seemed rather sparse in these parts of late. I've been working on a few things in the background, but aside from the
blouse, I am at a loss to think of what else I've made! Partly to blame is my daydreaming about summer clothes that I need: shorts (I think I need to make a couple more based off
this pattern), possibly a little 50-style
playsuitthat I can throw a skirt over for street-wear, and tshirts. The latter is something I've been putting off for ages, but now that my favorite white tee has finally bit the dust, it's time for me to get serious and use the jersey I have been saving for just such a project. Expect to either see a post with a tshirt I triumphantly finished, or me avoiding the topic because I made a terrible mess of the whole thing. lol.

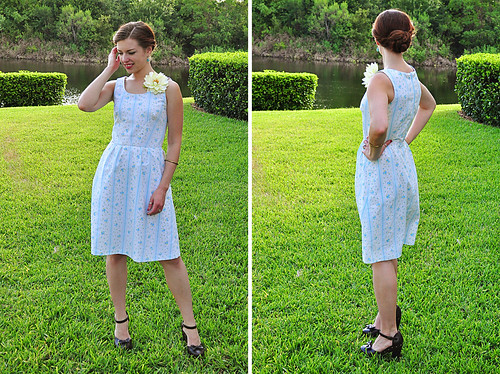
This long-winded paragraph did have a point: I managed a little sewing over the past week: a pretty little 60s-inspired dress from one of the new Lisette for Simplicity patterns: the
Passport dress. The unusual dart configuration (at least for a dress pattern from Simplicity!) really drew me to the pattern initially; it reminded me of some of the illustrations in a 1960s dress pattern drafting book I have. For the fabric I used one of the sheets I thrifted earlier this year (though to be honest I still have a good 1/3 of the sheet left...), underlined the bodice and lined the skirt completely. Those eagle eyes will spot that I used a natural-colored cotton for the lining; the was a little bit of "color alteration" on my part. The sheet itself was a bright white, which never flatters my skin, so the creamy tone of the underlining softened the white in a subtle way. (I wore this Saturday and had my hair in a fabulous 60s beehive ponytail 'do, but alas the weather turned bad and I didnt' get any snapshots until Sunday--at which point I did not feel like redoing my hair for the day. hehe!)
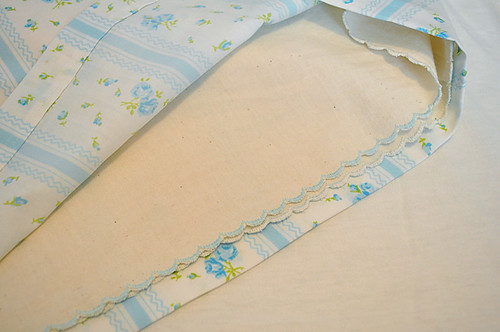
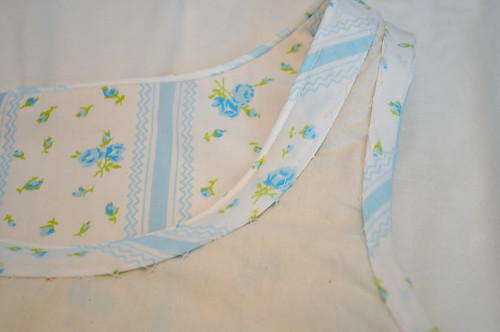
I used a couple of techniques I hadn't used on an actual garment before: piped bias facing around the neckline, and a scallop-hemmed skirt lining. The latter was inspired by the hem of a Anthropologie garment in my closet; I loved the idea of using contrasting thread and the scallop stitch on my machine to create a finished lining edge. I just stitched the scallops at the level I wanted (about 5/8" shorter than the shell hem) and trimmed the edges. I still need to apply a teeny bit of Fray Check though. The piped facing was something I'd been itching to try (as seen in a couple of my vintage sewing manuals), and was quite fun to do since it gave a decorative edge finish and faced the neckline all in one go! Since I thought this was such a neat technique, I documented how I did it and have shared it below (just in case you'd like to know!). Another minor adjustment I made was to move the zipper from the side seam to the center back; it was just a personal preference on this particular dress and echoed some of my favorite vintage 60s day dresses.
Thoughts about the pattern? I was highly impressed with how well this went together, the drafting (I cut out the bodice based on the finished bust measure, and miracle of miracles! it didn't have the enormous amount of ease that the Big Four tend to draft into their patterns. Yay!), and the instructions were impressive as well. I usually have to do some major adjustments (lengthen the bodice, shorten the skirt, adjust for a small bust, etc.), but because finished measurements were included on the pattern pieces, I was able to cut between a couple of sizes and only had some minor fitting to do.
Sarah mentioned in her post on making the Passport dress (absolutely adorable version in yellow--you must go take a peek!), that this would be a great beginner project, and I couldn't agree more. Though it may look complicated because of the darts, it's really easy and thoroughly explained. Quite a difference from the usual ho-hum drafting and instructions I've come to expect from the big commercial companies. Bravo, Simplicity! I think the only thing this dress needs now is a little white
bow belt... (But then again, I think
everything needs a belt... so I'm a little biased.)
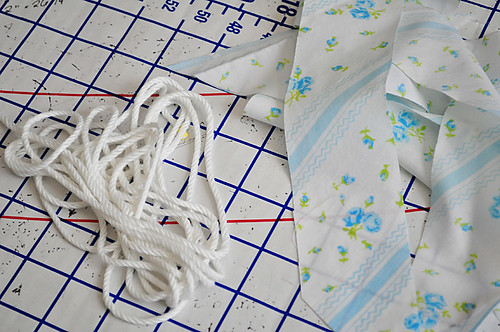
If you're curious how to construct the faced bias piping, read on...
You'll need 1/8" wide cotton cording (easily found at most sewing stores; just be sure to pre-shrink it first!) and a bias strip (or series of strips pieced together) cut 2" wide by a few inches longer than the opening you're facing.
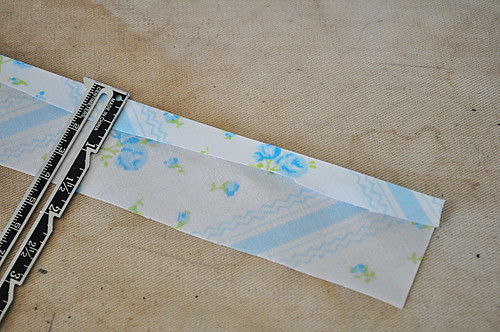
Begin by folding 1/2" of the long edges to the wrong side and press the fold down the entire length of the strip, being sure not to stretch to bias.
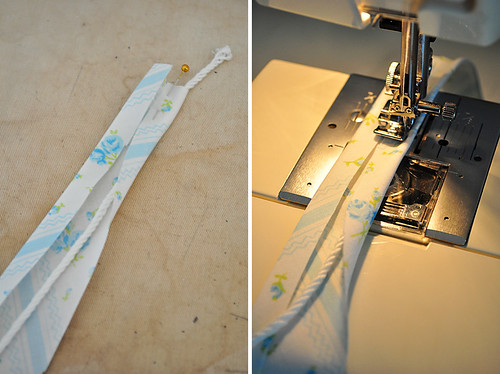
On the opposite long edge, place the cord about 1/2" in and fold the edge over. I just like to start the fold towards the top and manipulate the fabric as I sew. With a zipper foot on your machine, stitch as close to the cording as possible, so the fold around the cord is snug but not tight. Try and keep the fold even. Go slowly--this takes a little practice if you've never done it before! Stitch down the entire length of the bias strip, enclosing the cord. Trim cord at the end if necessary.
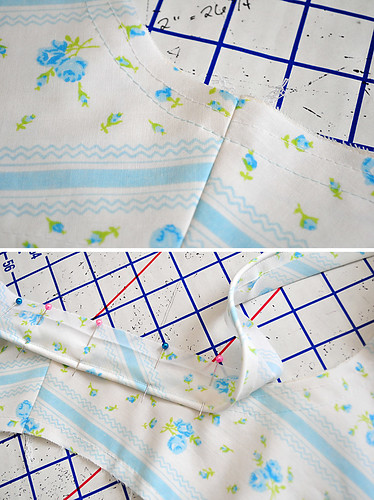
Baste around the neckline (or opening you are facing) the width of the seam allowance; in this case 5/8" for me. Using the basting line as a guide, pin the bias strip to the neckline, right sides together. Make sure the corded edge is facing towards the garment and the fold edge is facing the seam allowance. Line up the stitch line along the corded edge with basted seam. Gently stretch around curves as needed.
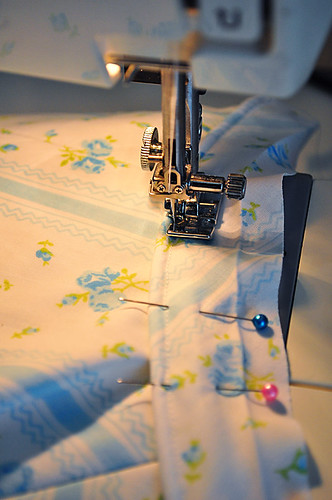
With the zipper foot still on your machine, stitch along the cording, over top the previous line of stitching. Again, go slowly and be as precise as you can. Since the edge being faced was a neckline, I started and stopped at the back opening 5/8" away to allow for the zipper insertion and turning the edges of the facing under after that was installed. If you're doing this on a closed opening, be sure to turn under and lap the ends so that there is a clean finish.
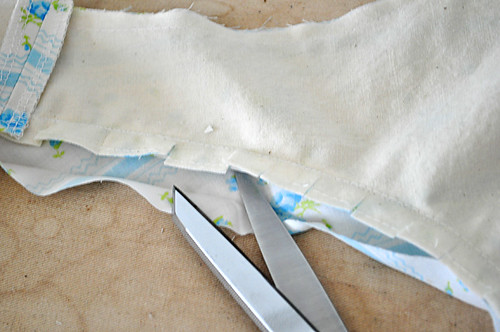
Grade the seam allowance (I like to use an uneven grade on allowances that have more than two layers of fabric) and clip the curves.
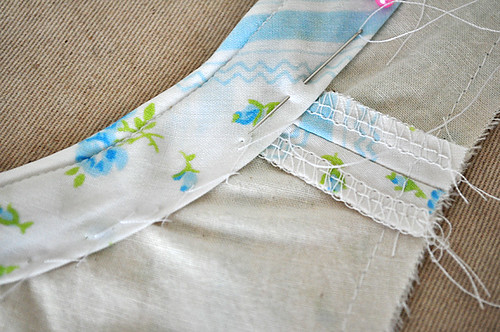
Press the facing's folded edge to the wrong side and pin down. Catch stitch along the fold edge with a single thread and taking small "nips" (just two or so threads) of the bodice fabric as you go.

Done! I really like how nicely finished the resulting edge is, plus the piping detail!


Comments
Post a Comment
Thank you so much for taking time to comment! I LOVE hearing feedback from readers. I welcome truly constructive and thoughtful critique and suggestions, but will not hesitate to delete spam or downright rude comments.