diy: make a vintage style (faux) fur collar
Be sure to scroll to the very end of this post for a giveaway!

This tutorial has been rolling around in my sketchbooks and imagination for oh, a good year! I finally spent some time this past Sunday working it out and documenting my steps to share with you. Now that the weather is turning cold, it's the perfect time to pull out some fun (faux) fur accessories to add a bit of pizazz to your cardigans and dress necklines. This is a super easy accessory to make and only requires hand sewing skills! I think these would also make amazing gifts--and their easy to customize with different closures and fur types!
I think the gals over at Colette Patterns and I must be communicating telepathically on a subconscious level about our inspirations lately, because they just posted a fantastic tutorial on how to make a detachable collar for a winter coat. So if a basic jewel-neckline collar isn't quite your thing, be sure to check that out! (And yes, I realize that it can be a bit silly having mine come on the scene right after, but hopefully you'll find one or the other--or both--useful!)

Supplies:
- 1/2 yard faux fur
- sew-in interfacing (I used hair canvas, but any heavy weight sew in should work)
- 1/2" wide cotton twill tape or rayon hem tape; approximately 1 yard
- 1/2 yard lining fabric
- hook and eye (or other method of closure; see end of tutorial for details)
- pattern/tracing paper
- pencil, pen, paper scissors
- thread to match fur
- needles, pins, fabric shears,

Begin by printing off the collar pattern here. (The pattern is similar to how BurdaStyle packages their patterns for home printing. Please see this tutorial if you need help printing and assembling.) I have drafted several sizes for a basic Peter Pan and pointed collar styles for a jewel neck. Cut out the size you wish to make (closest to your garment neckline or neck measure). To make the collar pattern longer, slash at intervals and spread to the correct length. Retrace pattern. To shorten, simply fold at intervals along length to the correct measurement.
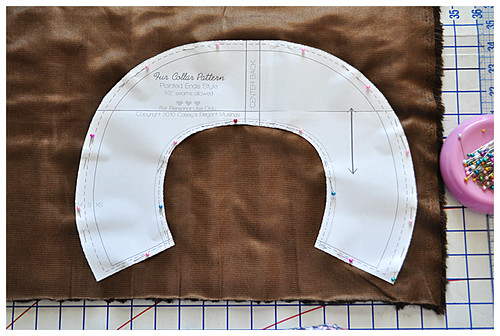
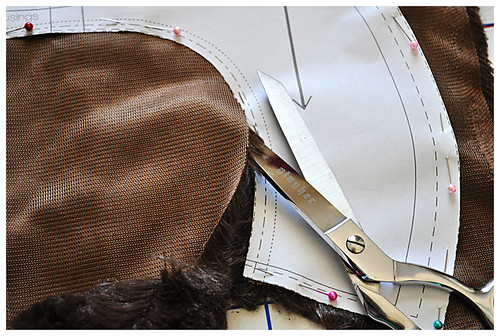
Lay the pattern on the fur, fur side down. Make sure you have the nap of the fur going in the direction you want it to lay (usually down, towards the outer edge of the collar). Pin in place and cut. If you are using a longer hair fur, be sure to carefully cut around taking shallow snips of the backing only, so as not to damage the length of the fur around the outer edges.

Using the collar pattern, cut one from the lining material.

Cut out another collar piece from the sew-in interfacing. Cut off the seam allowance (1/2") around all edges. (This interfacing will add a bit of body to the faux fur, since they tend to be a bit too soft.)

With a pencil/marker, draw a series of parallel, horizontal lines, 1" apart on the interfacing.
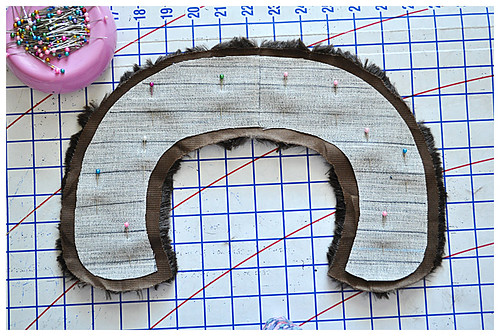
With the wrong side of the fur collar facing up, lay the interfacing in the center (lines facing up) with an even 1/2" around all edges. Pin in place.
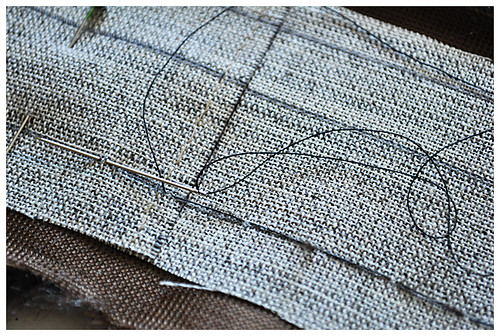
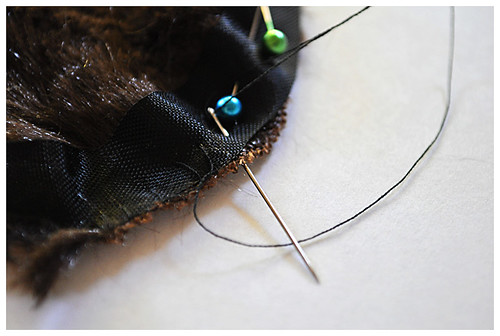
Using a single thread, sew an uneven basting stitch to attach the interfacing to the fur. You will want to take very shallow stitches on the fur, just catching the backing. For a great tutorial on this technique, be sure to watch Gertie's video here.
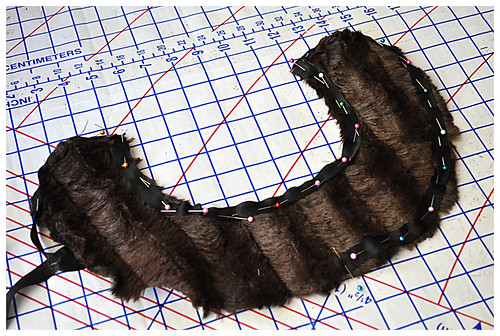
Fur side up, pin the twill/hem tape around the edges of the collar, easing around curves. Using a blanket stitch 1/4" long and 1/4" deep, sew the tape to the edge of the collar.
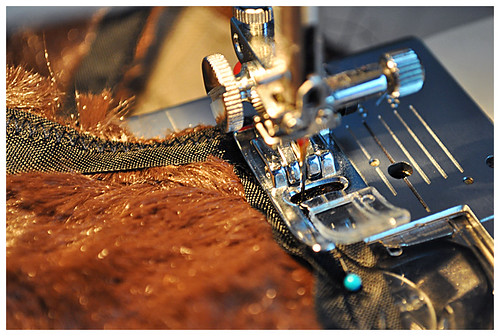
Alternatively, you can also attach the tape with a long machine zig-zag stitch around the edges.

Turn collar wrong side up and fold over edges 1/2", following edge of interfacing. and pin to back.

If you are using a longer hair fur, you will need to use a pin to free any bits of fur that were caught in sewing the tape to the fur.

Using a single thread, catch stitch the tape to the interfacing around all edges. The inner neckline curve will require a bit of manipulation to lay right; you'll want to curve it slightly over one hand as you stitch, mimicking the curve of a neckline.
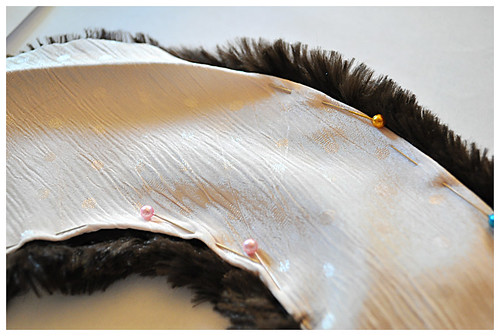
Press 5/8" to the wrong side of the collar lining along the edges. Place over the fur collar, wrong sides together and pin in place. You will probably need to ease a bit over the inner neckline curve. Just pin in place as best you can at this point, and smooth as you stitch.

With a single thread, slip stitch the pieces together along the edges, being sure that your stitches are hidden.
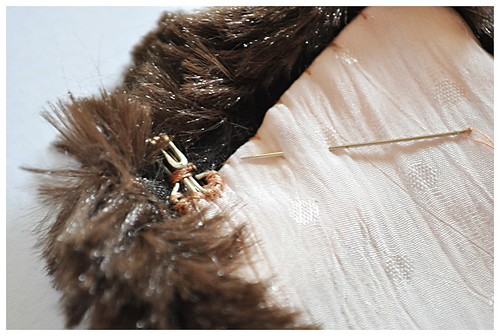
There are a couple ways to make your collar detachable. Firstly is to just finish the center front top edge with a hook and eye (or button and thread loop, or frog; or nothing at all and pin it together with a brooch). Which means it can be worn with just about anything! (See above.) To further embellish your collar, you can sew on a little bow, add a sparkly vintage brooch, or a large button to the closure. Or maybe even long cord ties with matching fur pom poms!
But if you wish to make it stay securely on a particular garment, you will need a handful of medium-sized snaps and a length of 1/2" to 3/4" wide grosgrain ribbon that closely matches your fur. (Note: I used white twill tape in this tutorial for illustration purposes only.)

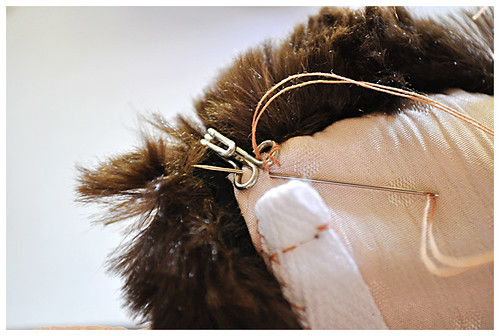
Cut the ribbon 2" longer than the inner neckline measurement. Turn the edges under 1/2" and then 1/2" again, hemming by hand or machine. Pin one long edge to neckline, right along the edge where the fur and lining meet.

Using a single thread, whipstitch with small stitches (again, I used contrasting thread and larger stitches so it would show up!) the one edge of the ribbon to the lining.
Stitch a hook and eye to the center front edge as described above.

Find the center back of the collar and the inside cardigan/neckline you wish to attach it to. Mark with pins. Sew one half of the snap to the center back of the garment neckline.
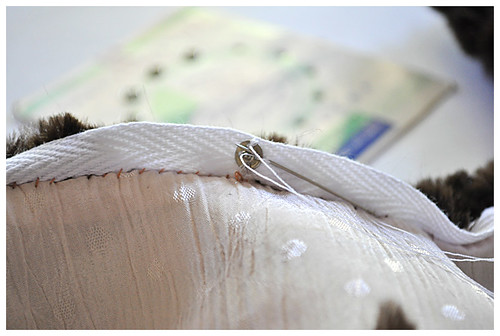
One the collar, sew the other snap half on the underside of the ribbon strip.

Mark more snap locations along the garment and collar ribbon from this center point, about 1 1/2"-2" apart. Sew on snaps accordingly.
Alternatively, if you desire something a bit more permanent (but still removable), you can always attach the ribbon and just whipstitch it to the inner neckline of the garment. I've seen this in a lot of vintage sewing manuals, but it still allows for removal for cleaning!
Here are a few links to other resources that deal with faux fur sewing:
- Removable Coat Collar from Colette Patterns
- Tips for Sewing with Faux Fur from Fehr Trade
- A book I have found extremely helpful in learning how to sew faux fur is from the classic 70s sewing series The Art of Sewing: Novel Materials
- Some helpful tips in a tutorial on making a fur muff from BurdaStyle
- I also noticed that the current issue of Sew Stylish magazine on newsstands had a good article on sewing faux fur as well--definitely worth checking out!

Vintage-Style Faux Fur Collar Giveaway
Because I had too much fun with the last giveaway, I wanted to do one for this tutorial as well! I've made an extra collar for one lucky reader (and yes, it has an Elegant Musings tag sewn in too!). It's an approximate size medium*, made with a faux mink fur, embellished with a vintage button, and would look darling with cardigans and cute vintage dresses alike! (*I think even for a slightly larger or smaller size it would work depending on the neckline you wore it with! The finished measurement around the inner neckline is 16 1/2" or approximately 42cm.) Please note this giveaway is for the pointed collar variation, not the Peter Pan. Here's how to enter for a chance to win this:
- Leave a comment in this post telling me what your favorite wintertime accessory is and how you like to wear it.
- If you would like additional entries, you can Tweet (be sure to include @elegantmusings) or post on your blog about this giveaway with a link back. Just be sure to come back here, comment and post a link to your Tweet/post in a separate comment! (Feel free to use one of the images here in your post.)
- This giveaway will be open until November 27 at 10pm. A random winner will be drawn and I'll announce them the following Sunday.
- This giveaway is open to readers worldwide!

Comments
Post a Comment
Thank you so much for taking time to comment! I LOVE hearing feedback from readers. I welcome truly constructive and thoughtful critique and suggestions, but will not hesitate to delete spam or downright rude comments.