diy: thrifted revival
I haven't done a large-scale refashion project for myself in ages. Aside from that dress I redid for the Sew Stylish article, I haven't really done any refashioning of note this year. In part because sewing something from scratch has been far more enticing, despite the challenges that refashioning an existing garment can provide (and those challenges can be awfully fun to figure out!). So when I spotted this dress for $1 while Mom and I were thrifting a couple weeks ago, I knew I had something that would be an excellent refashion canidate.
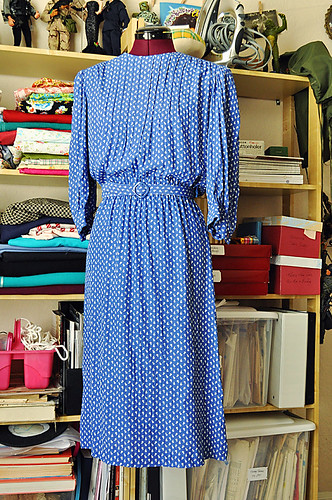
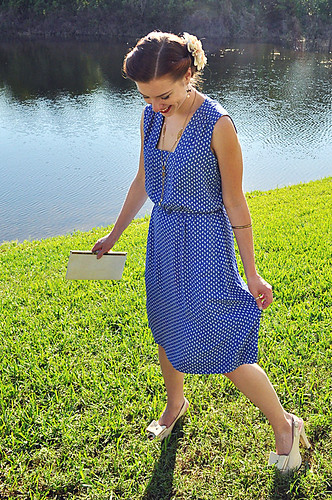
This humble 80s number started out life as a rather bland and unassuming office dress. The medium blue rayon print is what caught my eye in the racks (and the price tag too), and it had a darling matching belt as well. My original intent was to remove the sleeves and shorten the hem, making a cute (if somewhat conservative) summer day dress. However, once I got the dress home and was looking at it in bright sunlight, I noticed several stains on the center front of the bodice. After a few attempts at removing the stubborn stains (which were faint, but there), it was apparent that either this dress would have to be salvaged for another project (skirt, maybe?) or I'd have to come up with a creative solution to work around the small sliver of stained fabric on the front.

Unsure of what exactly to do (at the time my thinking only went so far as ruffles, but didn't feel right for this dress), I was flipping through a book from the 80s on Princess Diana's style. There I spotted a dress with a very similar shoulder line and material, sporting a lowered neckline inset. Well, in reality it was a dress and jacket, but in my prior-to-sleep state late at night it looked like a one-piece dress. (Note to self: read the descriptions!) A solution had been found: simply remove the bodice and skirt, slice open the front to remove the offending stained portion (and use the front edges to create a facing) and add a new inset piece fashioned from one of the sleeves. Yes, it was a bit of work, but I got it largely done within a few hours on Saturday, and a new (and far more flattering) neckline was in the equation as well.
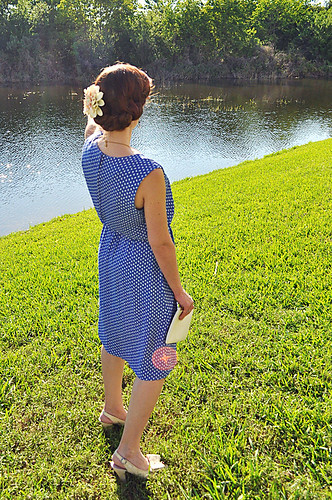
This dress is actually one of the bunch I'm using in my 30 for 30 challenge, which I "cheated" on and started yesterday (instead of the planned-for Monday kickoff). I honestly should have just waited for today, since I was in a mood yesterday with my clothes and could not seem to grab any accessories that I felt really made the outfit memorable (that is, before I had to rush out the door first thing in the morning). Despite this, I was tickled that not one but multiple people stopped me to comment on the dress. Not nessecarily because it was something I refashioned, but because it was a humble $1 thrift find originally! I always love dresses with lowly origins that end up being showstoppers, don't you?
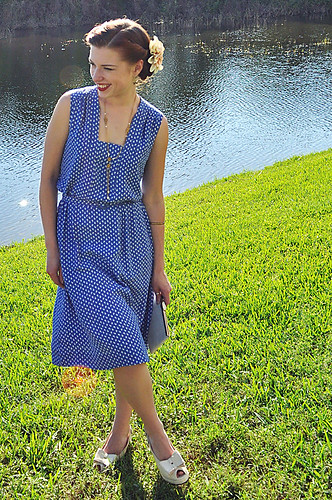
all outdoor photos by Sailor Husband!
I didn't document how I did the neckline step-by-step (frankly, it was one of those things where once I got started, I didn't want to stop and take photos), but I did do a little picture tutorial on how to create new armhole facings. Which is helpful if you want to remove the sleeves off an old dress--it's a really easy refashion to do, and as long as your sleeves are large enough you can always reuse the fabric for the facings (I just used something else since I had the sleeves earmarked for the neckline inset). Be sure to click "more" to view the steps.
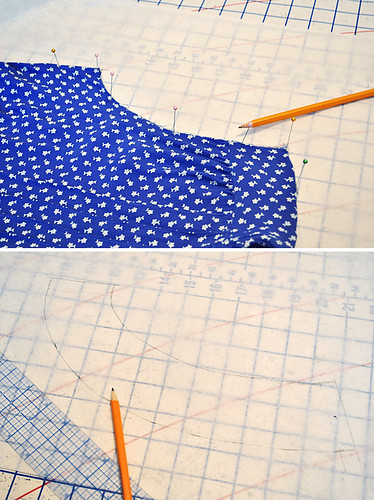
Remove the sleeves from the dress by either using a seam ripper, or carefully cutting away the sleeve following the seamline closely. Fold the dress along the underarm and shoulder seam lines, in half (since my dress didn't have a definite shoulder seam, I just guessed). Pin to a piece of paper, smoothing out the armhole area (I usually do this on my cardboard cutting mat). Trace this armhole line and remove the dress. Measure in from this line the desired width of your facing, plus one seam allowance (in my case the facing was 1 1/2" wide with a 1/2" seam). Add a seam allowance at the shoulder line and underarm as well. Cut out four. Interface if desired to stabilize.
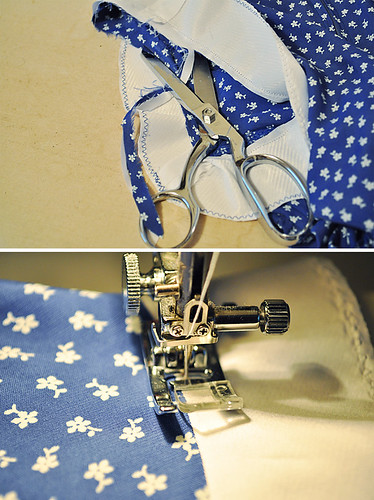
Stitch one set of the facings, right sides together, at the shoulder and underarm seams. Press seam open and repeat for other facing pieces. Pin each facing, right sides together, at the armhole, matching underarm and shoulder seams. Stitch. Grade seam to 1/4" and clip curves. Press seam toward facing. Understitch close to the facing/armhole seam along the facing. This helps the facing roll to the inside. Turn right side out, press facing to inside and secure with a few hand stitched tacks at the shoulder and underarm.
Has anyone else been refashioning anything lately? I think it can be just as challenging as creating something from scratch--sometimes more so when you have to come up with creative solutions!


Comments
Post a Comment
Thank you so much for taking time to comment! I LOVE hearing feedback from readers. I welcome truly constructive and thoughtful critique and suggestions, but will not hesitate to delete spam or downright rude comments.