diy: scalloped collar tutorial - part 1
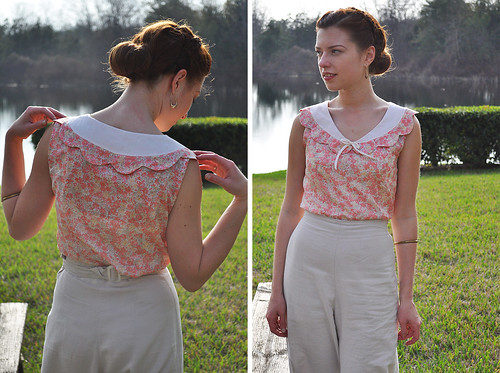
It seems like so long ago that I promised this, but I have finally managed to finish up my second scalloped collar blouse and tidy up the tutorial to share with you all! (Pictures of the new one will be in part two; you can see the original post for the first one here.) I hope it was worth the wait; my apologies that it's taken so long. Since this is a sleeveless blouse and the weather is warming up, hopefully it will be timely for many of you for some spring and summer sewing! This tutorial got somewhat lengthy as I was writing it, so I'm dividing it up into two parts; this first installment will deal with adjusting the neckline and drafting the collar. I'll be posting part two--how to sew the collar--next week.
To begin you will need the Sewaholic Pendrell pattern, although I should think any similar blouse pattern would work too. Keep in mind that this tutorial was written for the Pendrell pattern. You will also need 1/2 yard additional material for the scallop portion of the collar, as well as 1/2 yard of contrast fabric for the inner/contrast collar. Though this pattern does suggest knits, this would not work well with a knit fabric. I've used lawn both times for my blouses, and similar lightweight but crisp fabrics would work best. You want something that holds the edge of the scallops well. In addition to the supplies the pattern calls for, you'll need the usual pattern drafting materials: tracing or banner paper (I use this, rulers and hip curve, a drafting compass to draw the circular shapes for the scallops, marker, pencil, paper scissors, etc.

Begin by tracing the center front piece of the size you require. Mark the seam allowance (5/8") inside the neckline with dashed lines.
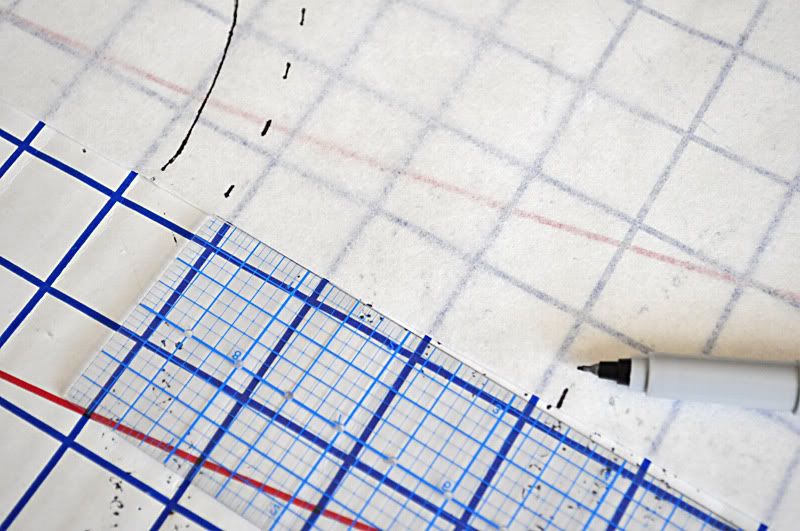
Determine how low you would like the v-neckline to dip; I chose 3 3/8". Mark this point from the seam allowance line down along the center front.
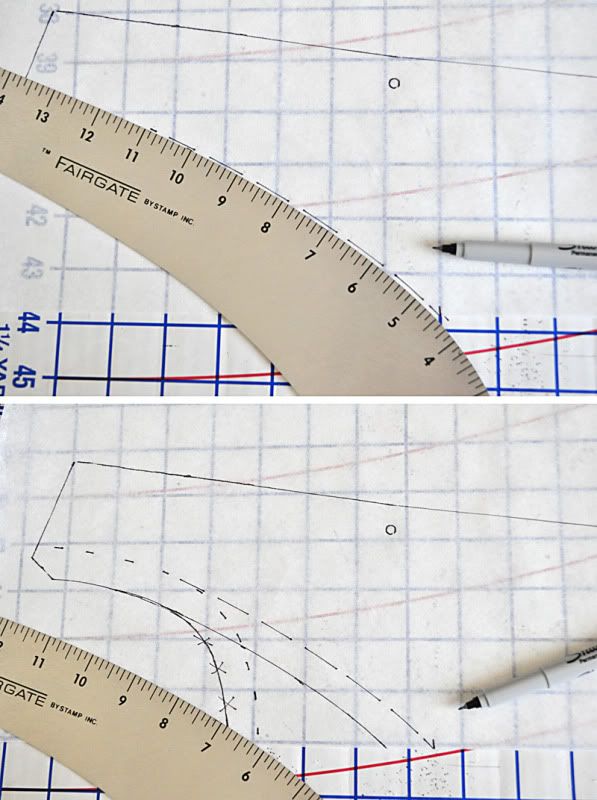
Using a hip curve (or you can freehand this if you'd like!), draw in the new neckline. Blend from the seam allowance marking along the shoulder edge of the neckline to the mark. Measure and add a seam allowance (5/8") along the new neckline. Cut along the neckline edge.
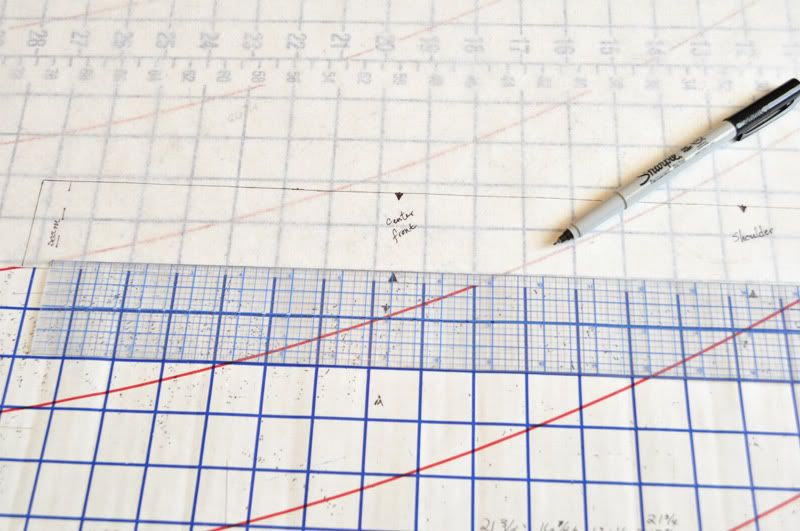
Grab the center back blouse piece. Drawn a line 5/8" from the edge of each shoulder. Lay the front shoulder over the back shoulder, matching the seamlines at the neckline edge.

At the outer edge of the shoulder, overlap the seam allowances by 1/2". At this point I like to tape the shoulder pieces together for the next step. Mark 5/8" from the outer edge of the neckline to indicate the seam allowance.

Lay a piece of pattern paper overtop the pieces and trace the necklines (along inner mark without the seam allowance), and down about 4" along the center front and back lines. Also mark the shoulder line at the neckline edge.
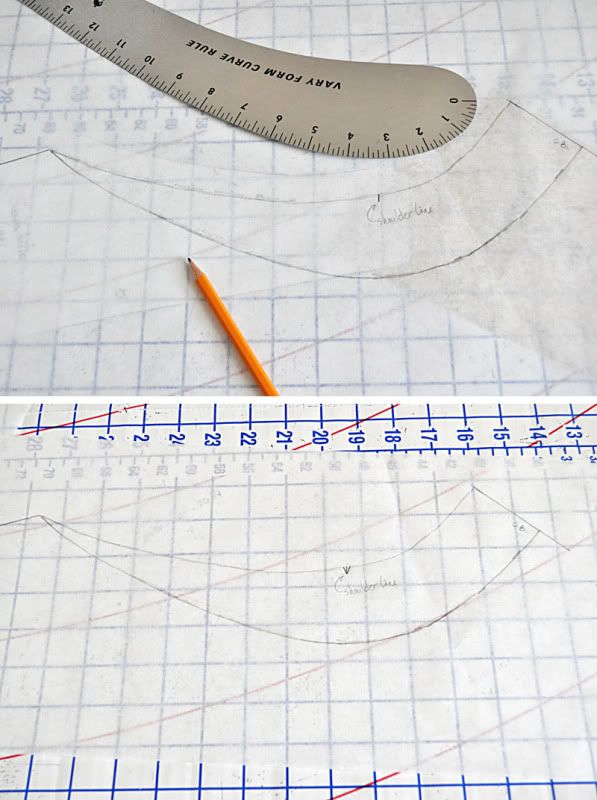
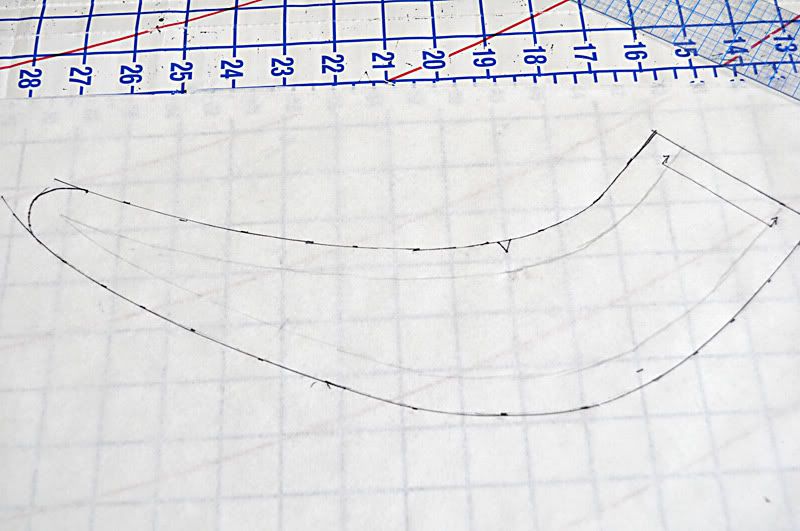
Mark the depth of the collar along the center back line (I chose about 2 1/2"). With the hip curve blend from the lower edge of that line you just marked along the center back, to nothing at the center front. I like to keep the width even from the center back to about the shoulder point, and then begin to decrease the width. Remove the pattern paper.
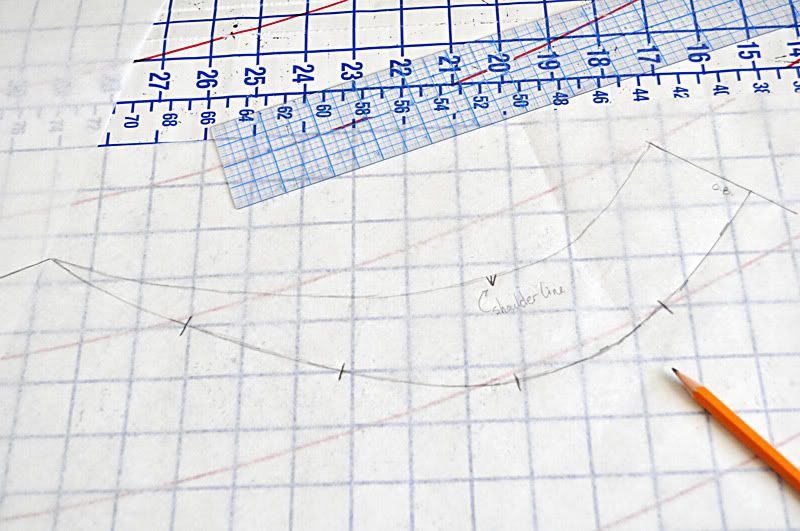
Next we'll be marking the scallops; measure along the outer edge of the collar piece. I decided to create 10 scallops along the edge, since the number divided easily into the half collar measurement. But you can decide how many scallops to create along that edge based on the measurement of your collar. For instance, say the collar outer edge is 16 1/4" (for half), and you want 5 scallops along that half (for a total of 10). Each scallop will be 3 1/4" wide. Mark your scallop width along the outer edge of the collar.
Using a compass or a circular object with a similar diameter of each scallop (in this case 3 1/4" for the sake of the example), draw a circle on a seperate piece of paper to create a template (I like to use a slightly heavier paper or light card). Cut in half down the center and around the edges. Line up the half circle template along the edge of the collar, lining up the edges of the circle template with the marks you made in the previous step. Trace around the template, and repeat for the remaining spaces along the collar.
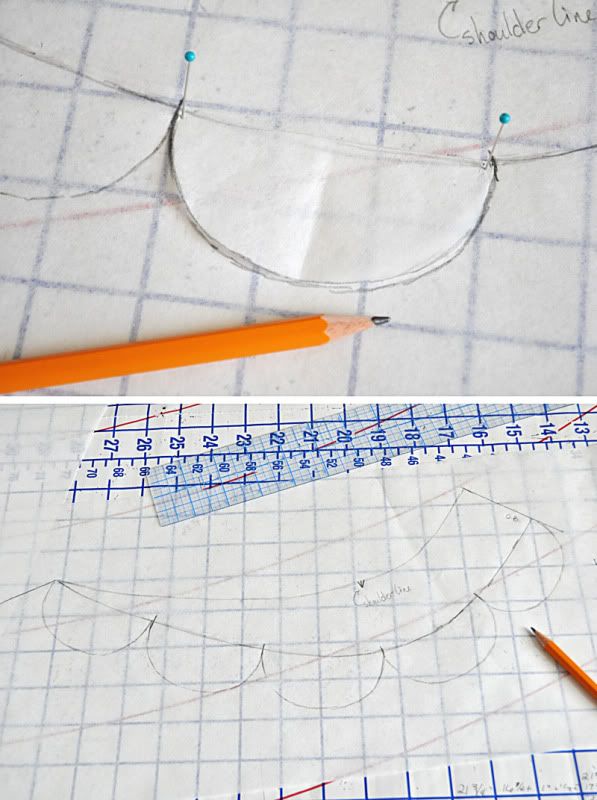
Take another piece of tracing paper and lay it overtop the collar draft we've been working on. Trace along the scallops and that outer edge of the collar. Mark the center front and back edges, and indicate the shoulder line point.

Add a 5/8" seam allowance along the edge without scallops, and 1/4" to all other edges (except the center back). Draw a straight line from the 5/8" to 1/4" seam allowances along the center back and indicate it should be placed on the fold.
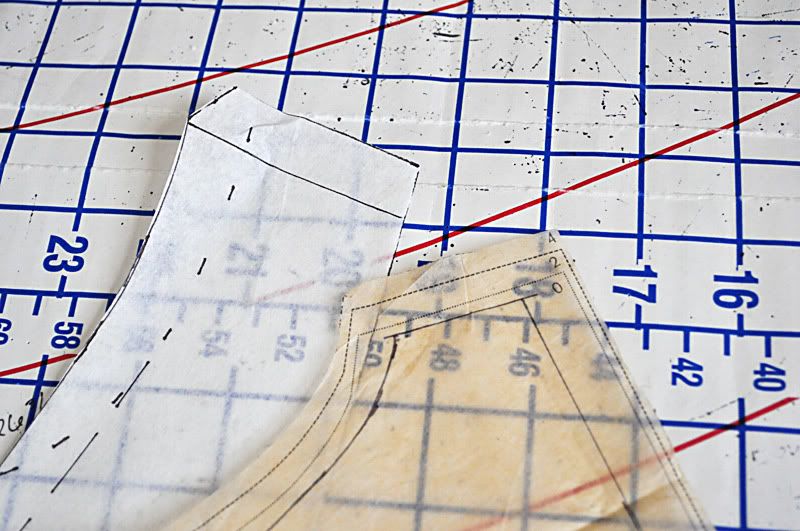
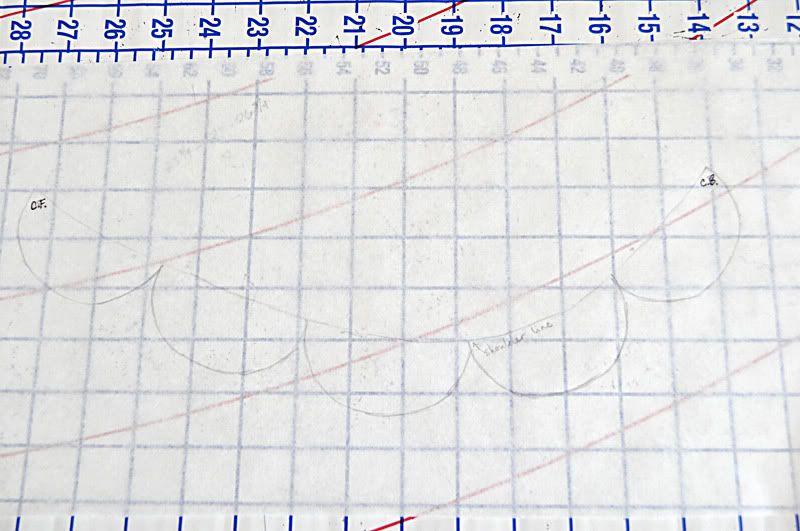
Remove the piece of pattern paper that you've been working with, and put another over top the collar draft. Trace around the entire collar. Add a 5/8" to all edges except the center back edge. Mark that to be placed on the fold.
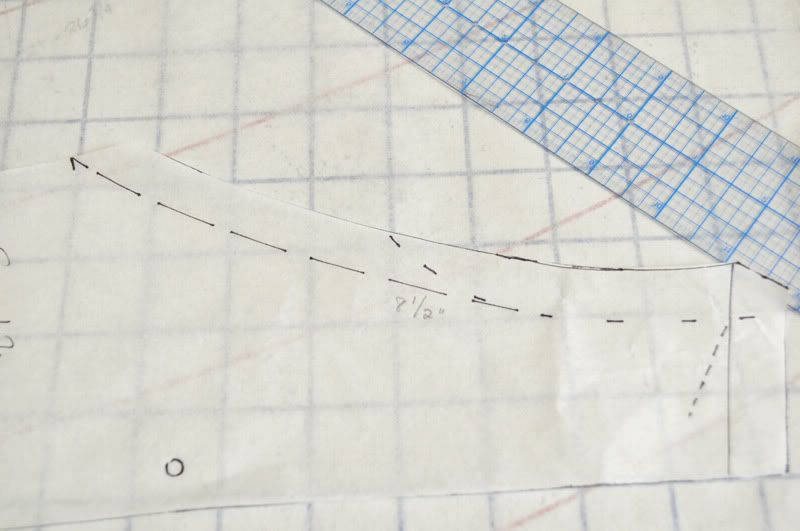
We're almost done with drafting--hope you're hanging in there! Next we need to adjust the neckline binding piece to accomodate the v-neck. Measure the original front neckline and the new v-neckline.
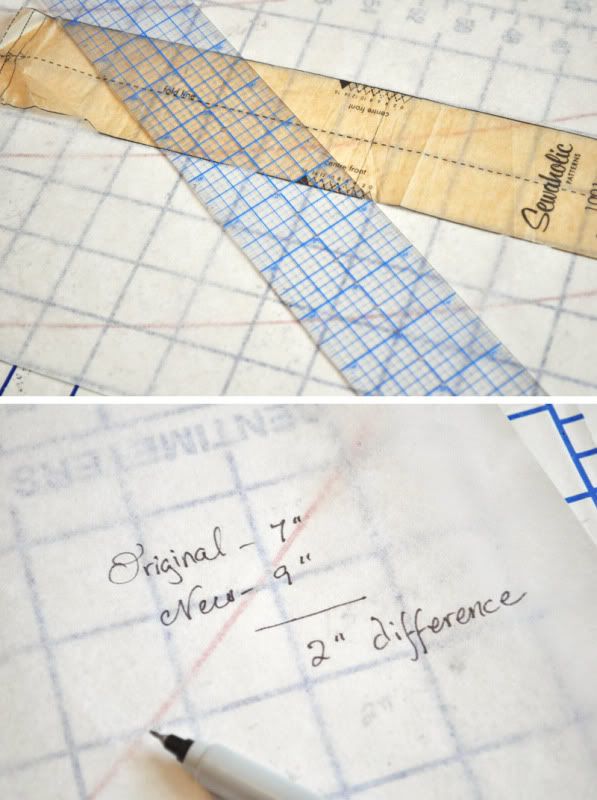
Subtract the original neckline measurement from the old; this is the amount you will need to lengthen the binding piece by. Measure the length and width of the neckline binding pattern piece that came with the Pendrell blouse. Add the additional length that you found in the step above to the length of the original piece.
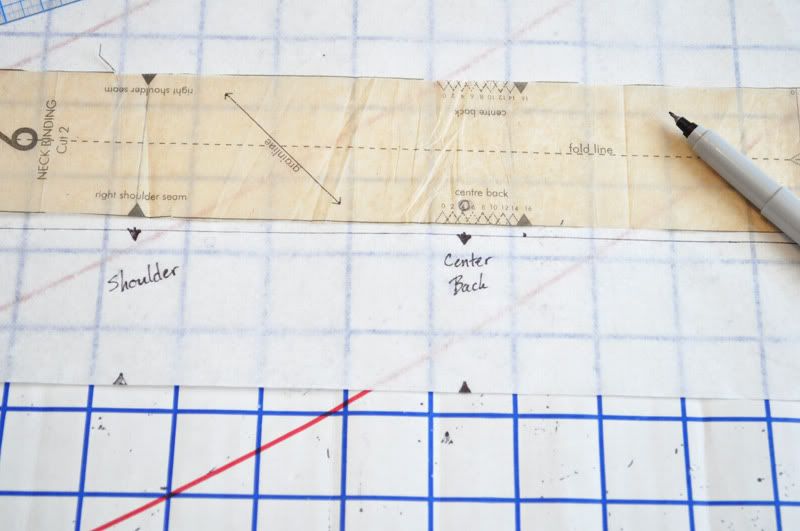
On a new piece of pattern paper, draw a rectangle the total length of the new neckline by the width. Transfer the original placement of the center back and shoulder notches (the two notches closet together along the long edges--see photo) to the new pattern piece.
Along the short edge opposite the notched end of the binding piece, draw 5/8" from the edge to denote the seam allowance (dashed line in the photo). Measure from the dashed line to the shoulder notch and divide this length in half. The center point will be where the new center front notches should be marked. Transfer grainlines and other pattern piece information.
And... we're done with drafting! I hope I've made this clear; it was a bit tricky to spell out exactly how to do it. Please feel free to ask if you need something clarified or if I've completely bungled a step! Up next I'll be covering how to sew the scalloped collar, so stay tuned for that.


Comments
Post a Comment
Thank you so much for taking time to comment! I LOVE hearing feedback from readers. I welcome truly constructive and thoughtful critique and suggestions, but will not hesitate to delete spam or downright rude comments.