diy: make a 1950s bow headband
Be sure to scroll to the bottom of this post for a giveaway!

In the culinary world, an amuse-bouche is a single-bite appetizer-like food. It basically means something to "amuse your mouth" (or tickle your taste buds)--a quick fix of deliciousness. This little project is my sewing amuse-bouche in a way. I've been so bogged down in projects that are dragging out (the Lady Grey and a slipcover for our sofa before my inlaws arrive for Thanksgiving!), that I needed a quick sewing fix that I could do in a tiny amount of time. This little headband fascinator was inspired by a tiny picture I spotted in a 1950s magazine and I set out to replicate it straight-away! Plus, it injects a little plaid into my wardrobe (I'm still looking for the perfect vintage plaid dress that doesn't break the bank), which is so perfect for this time of year. I think this would be fantastic in various fabrics for the holidays, for yourself or as gifts. Want to make one for yourself? I documented the steps so read on--it's super easy!
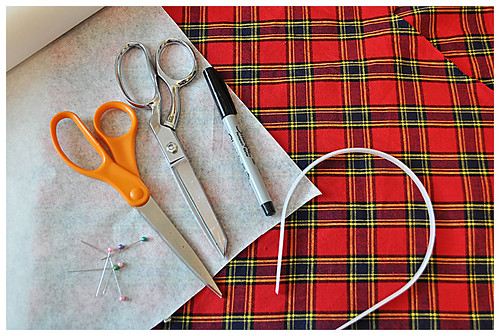
- 1/2 yard of light to medium weight fabric (any fiber)
- plastic headband, 1/4" wide (I purchased mine here)
- loop-turner (recommended, but you can use a needle and thread or small
- scissors (paper and fabric), pencil/pen, ruler, paper, thread to match, needle

On the paper, make three pattern pieces to the following dimensions (you could also just mark on your fabric, but if you want to make multiples, pattern pieces are the way to go!): Headband Cover 1 3/8"x14", and mark to be cut on the bias. Headband Bow 5"x15 1/2" marked to be cut on fold (short end). Bow Knot 3 1/2"x3" to be cut on straight or bias.

Lay the pattern pieces on the fabric, according to the grainlines marked. Cut one of each.
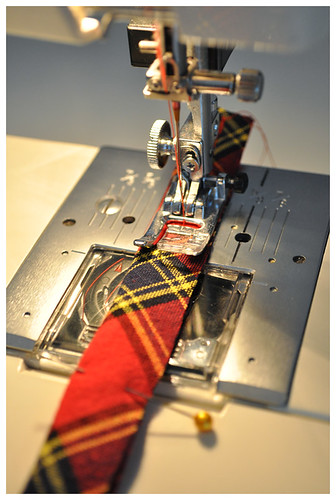

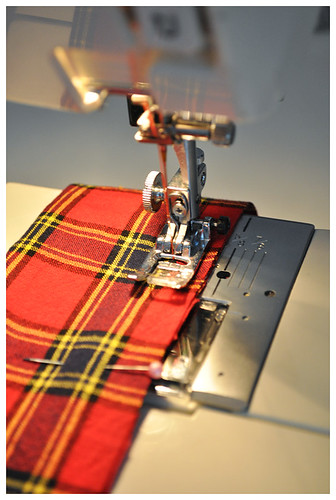
With Headband Cover, fold right sides together and sew a 1/4" seam down the long edges. (If you sew a little more than 1/4" that is okay--you want this to fit tightly over the headband.) Grade seam allowance. Turn tube right side out using the tube-turner.

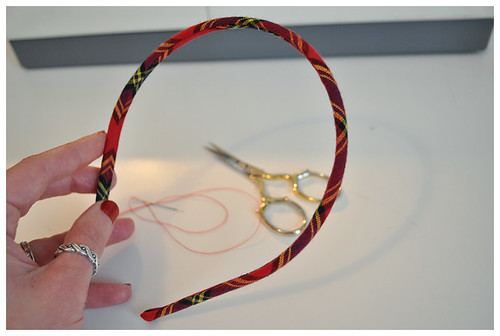
Slip the bias tube over the headband, easing it over the entire headband. Trim the ends if they are too long to about 1/4" longer than each end.
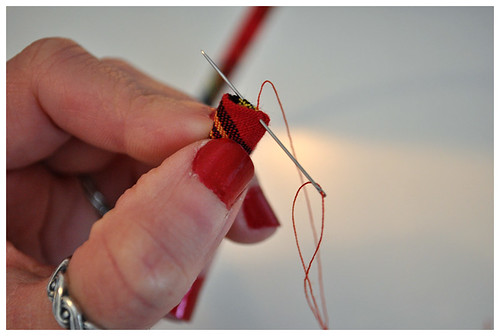
Turn the edges inside and slipstich closed using the needle and a single thread.
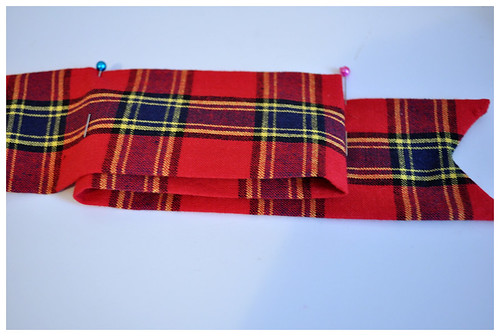
Pin long edges of Headband Bow, right sides together. Stitch with a 1/2" seam allowance, leaving a 2" opening at the center to turn the tube.
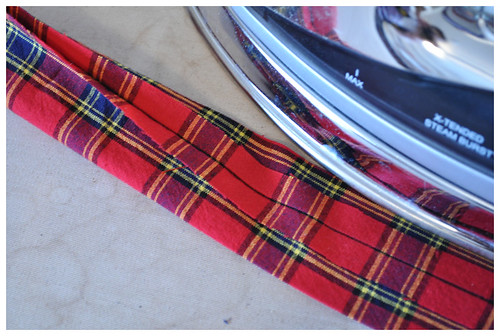
Press seam open, centering it at the center back of the tube. Do not turn right side out yet!
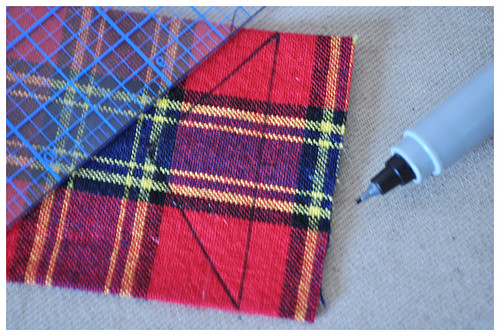
On the short ends, draw a parallel line 1/2" from the bottom edge. Measure up 3/4" and mark a dot at the center width of the strip (approximately 1" in). Draw a diagonal line from the center mark to the outer edge of the line and repeat to create the other leg of the bow end. Do this on both short ends.


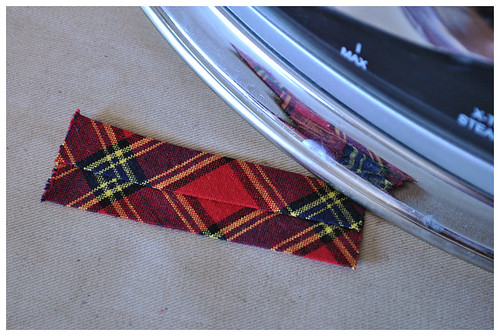
Stitch the legs of the bow ends, pivoting at the center and backstitching at either end. Trim seam close to stitching, clip corners and notch the corner. Turn right side out and press. Slipstitch 2" opening closed with needle and single thread.
With right sides together of Bow Knot, sew long edges together with a 1/2" seam allowance. Turn right side out and press flat so the seam is at the center back.

With bow facing right side (without seam) up, mark the center of the length with a pin, and then place another pin 2" from end on either side. Loop bow so the loop touches the outer pin and loops under at the center pin mark. Repeat for other side of bow.

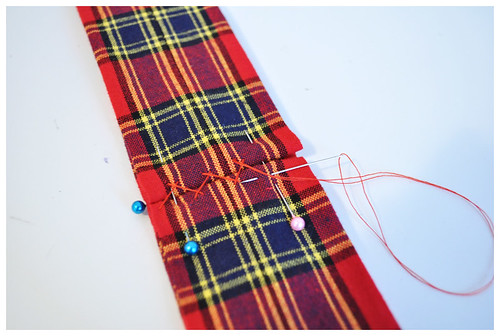
Pin all layers securely so they don't shift. On underside of bow, catch stitch the loops together at the center using needle and doubled thread.
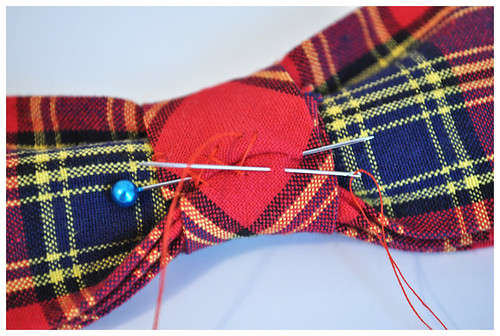
Place Bow Knot over center of bow, arranging it so it sits nicely on the right side. On the underside, turn under one raw edge of the knot 3/8" and overlap the other edge by 3/8" to cinch the center of the bow. Pin securely. Catch stitch folded edge to Bow Knot with needle and doubled thread.
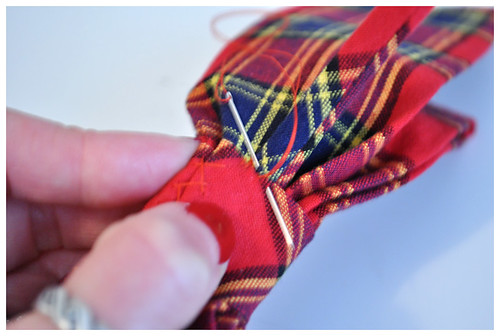
Slip headband through Bow Knot on the underside, sandwiching it between the Bow and Bow Knot and making sure it's centered along the length of the headband. Whipstitch the Bow Knot to the headband cover fabric, and be sure to take a few stitches on the bow underside to secure the headband in place.

Secure the shaped ends of the bow (not the loops) to the headband on either side with a few whipstitches as well.

Enjoy sporting your 1950s style bow! I think this would be lovely made up in a variety of fabrics--especially sumptuous ones like brocade, velveteen, or a shiny silk. You could also embellish it with some beads or sequins. The holidays are the perfect time of year to add some sparkle to even an everyday outfit!
50s Bow Headband Giveaway

If you don't want to make one yourself (or just like this one), I am giving away one to a lucky reader! I haven't done a proper giveaway in so long... it's shameful because I adore doing these. You'll get a brand new (unworn--I made two during shooting this tutorial) plaid bow just for yourself! I even added an Elegant Musings tag to the inside to make it "official". Here's how to enter:
- Leave a comment in this post for one entry telling me what your favorite small gift is to give to people for the holidays/birthdays/special occasions.
- If you would like additional entries, you can Tweet or post on your blog about this giveaway with a link back. Just be sure to come back here, comment and post a link to your Tweet/post! (Feel free to use one of the images here in your post.)
- The giveaway is open until Sunday, November 7 at 10pm (EST). A winner will be randomly chosen and I'll announce the winner on Monday.
- This giveaway is open to readers worldwide!
Is it silly I get so excited about doing a giveaway?! I think I might try to squeeze in one more before 2010 is over... Good luck with this one!!!


Comments
Post a Comment
Thank you so much for taking time to comment! I LOVE hearing feedback from readers. I welcome truly constructive and thoughtful critique and suggestions, but will not hesitate to delete spam or downright rude comments.