diy: how to refashion a cardigan

This post has been months in the making, but to those who were anticipating this tutorial, I hope it was worth the wait! For now I'm just posting all the steps here, but plan on formatting it nicely in a .pdf (so you can print the instructions out and keep them handy!) later, when I have a bit more time.
We all have them lurking in the back of our closets: those cardigan sweaters that we bought because they were “practical” or were 100% wool and on sale for a great price. But they languish because they don’t fit in the most flattering manner; the worst offenders are the large, boxy type cardigans. But you don’t need to banish these from your wardrobe anymore! Refashioning a cardigan into something more flattering on you is easy and only requires some simple sewing supplies and know-how, a small dose of patience and about one afternoon.
I started refashioning and embellishing my cardigans a few years ago when I wanted to recreate the high end looks that I saw in catalogs with the cardigans I had or found at thrift shops. Although much of my learning was trial by error, I have stumbled across a few good resources. My favorite is “The Yestermorrow Clothes Book” by Diana Funaro, published in 1976 (check Amazon and Alibris for second hand copies). It shows a smattering of ways to refashion all styles of sweaters, and I highly recommend finding a copy if you’re looking to explore other sweater refashioning options.
This tutorial is quite easy; I think even a determined beginner seamstress could easily do this. I have developed these techniques from several years of adjusting and altering my own cardigans, but this is by no means the zenith of cardigan refashioning. I encourage you to tweak and modify these steps and methods as you go along to suit your needs.
Supplies - a cardigan sweater (medium to light knits are the easiest to work with) - sewing machine with a zig zag stitch - a iron with an appropriate setting for your cardigan's fiber content - pins - sewing shears - thread to match your cardigan - marking chalk (or another marking tool that will show up on the cardigan knit)

1. First determine areas of the cardigan you want to refashion (img. 1). Do the sides need to be taken in to nip more at the waist? What about the length? Do you want the sleeves at a more flattering bracelet or elbow length? I will show you how to achieve all three easily.

2. Button the cardigan up most of the way and turn it inside out. Slip it over your head and button the remaining buttons. (Even if you do not intend to wear it buttoned, it improves the accuracy of marking the new seams.) Determine where you want the new waist to hit (the seam between the body knit and the waist ribbing), and mark it with a pin at the center front, each side, and center back (you may need an extra, helping hand for this!), and one or two between these points if needed (img. 2). Make sure they appear even on you. Carefully remove the cardigan. (Note: for this tutorial I am shortening the cardigan so the waist seam hits at my waistline, and the ribbing sits at the upper hip.)


3. Working with the cardigan inside out, measure down 1/2” to 3/4” from each pin, and mark. This will be you new cutting line. At the ribbing, measure up from the top edge of the ribbing the same amount you did at the top and mark (creating a seam allowance) (img. 4). This will be the ribbing cutting line. Cut along both these lines carefully, using long, straight strokes with the shears (img. 5). Discard or set aside the excess material cut from the cardigan. Note: if there are buttons that will fall within or near the seam allowance, remove them (at least for now). They can be replaced at the end.


4. With right sides together, ribbing side facing up, pin together the cut edges (img. 7). At your sewing machine, set the stitch to a medium length and a shallow (barely) zig zag. Sew the pinned seam, being careful to follow along the top edge of the ribbing and not stretching the knit as you go (img. 8). Fasten the ends securely by backstitching (knotting is not recommended, as it has a tendency to “pop out” of knit material).

5. Set the stitch to a wider zig zag and run along the outer edge of the seam to finish. Trim if necessary (img. 9). Press lightly (set the iron to an appropriate heat setting for the knit fabric).

6. Try the cardigan on again as you did in step 2. Analyze how you would like it to fit at the side seams along the body and sleeves. We will be taking this in at one time. Carefully pinch off an even amount at each side, tapering as needed from a wider point (such as the bustline) to a smaller one (the waist). Continue the pin line through the underarm and sleeve seam as necessary, working a smooth and shallow curve through the armhole seam (img. 10). Carefully remove the cardigan. Note: If you find it too difficult to accurately pin both sides, pin on side and remove the cardigan. Using a ruler, measure the same amount taken in on the pinned side and repeat on the other (not pinned) side seam. Slip the cardigan back on and check for fit. Adjust as necessary.


7. Working with the cardigan inside out, mark the pin line carefully; this will become your stitching line. Pin the front and back layers together securely with pins along this stitching line (img. 12). Using your sewing machine set at a medium stitch length and shallow zig zag, sew along the stitching lines on each side, taking care not to stretch the material, and fastening the ends securely. Trim the seam to 1/2”; with a wider zig zag stitch, stitch along this edge to finish it (img. 13). Lightly press.

8. Try the cardigan on again (as in step 2 and 6); we will be shortening the sleeve length now. Determine the new length for the sleeves; I opted for 3/4 sleeves on my cardigan. Mark this line on each sleeve with pins (img. 14); carefully remove the cardigan.

9. Working with the cardigan inside out, carefully mark this pin line. Measure down 1/2” to 3/4” and mark; this will be your cutting line. At the sleeve ribbing, measure up the same seam allowance you marked for the sleeve body, and mark; this is the ribbing cutting line. Cut along both lines and discard the excess material (img. 15). Right sides together, ribbing facing you, pin together the edges. You may need to ease in the excess sleeve body material. You can either do this with pins or run a line of basting stitches in the seam allowance to gather up the excess.

10. With the sewing machine stitch set to a medium length and shallow zig ziag, carefully stitch the sleeve together using the seam allowance you determined earlier (img. 16). Finish the edges as before with a wider zig zag and trim if necessary. Lightly press. Repeat for other sleeve. Note about sleeve alterations: This method assumes that the sleeve will be shortened to the elbow or a place below. Unless the cuff ribbing is really stretchy (or the sleeves really big), I do not recommend shortening the sleeves to any length above the elbow, as this could result in an unpleasantly tight cuff around the upper arm.

11. Press all seams as follows: waistline seam down, side seams back, sleeve seam down (towards ribbing cuff). Turn cardigan right side out and lightly steam. You may also want to lightly tack down the seams at the waist/ribbing by hand with a few stitches (img. 18). This will prevent the seam from rolling outward.

12. Now here is where the fun begins: you basically have a custom fit, blank cardigan now. You can leave it plain (as I did for this one; I have several embellished red cardigans already), or jazz it up a bit! Simply replacing the buttons is a start, but what about adding a little lace or fabric collar? Eyelet to the front edges? A row of faux award ribbons and medals at the upper chest? Ruffled lace along the neckline and cuffs? Using a bit of the leftover material cut from the cardigan body to create some gathered flowers? The possibilities are endless!
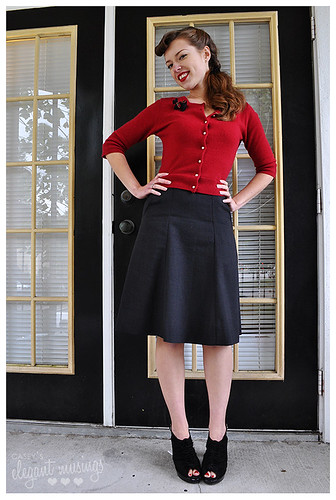
[ sporting my "new", custom fit cardigan! ]


Comments
Post a Comment
Thank you so much for taking time to comment! I LOVE hearing feedback from readers. I welcome truly constructive and thoughtful critique and suggestions, but will not hesitate to delete spam or downright rude comments.