diy: how to embelish a sweater with a little embroidery
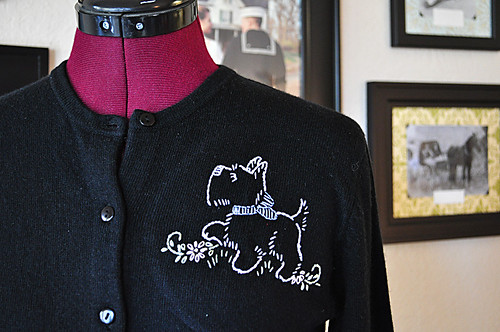
After being so cruel as to post some summertime fashions yesterday, I thought I'd better post something a bit more seasonal! lol. Over the weekend I decided to pull out one of the many thrifted black cardigans I have and add some embellishment to it. While a basic, jewel neck cardigan is a great staple to have, I admit I have more than one and multiples of the same thing are just a bit redundant. I had originally bought this particular sweater months ago with the intention of either adding beading or embroidery to it, but finally decided on what I wanted to do and how to accomplish what I envisioned! I thought I'd document the steps for how I embroidered a sweater knit; I do hope you enjoy! (A little disclaimer though: I am not an expert on embroidery, so if you're more well versed in techniques, please feel free to chime in the comments!)
The lovely thing about this embellishment method is that it is cheap. The sweater was thrifted for less than $2, I already had the supplies on hand, so it was quite budget-friendly. Even if you don't have all the supplies lying about, embroidery thread and tracing paper can still be had for literally pennies. Supplies you will need:
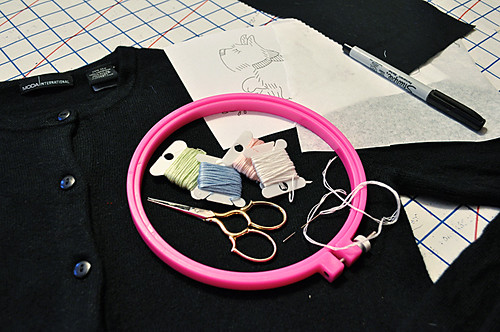
- jumper-style sweater or cardigan - whichever style you most prefer
- sew-in stabalizer - I used a piece of cotton voile, but organza or any other lightweight (preferably natural fiber) material would work. Just a scrap a bit bigger than your embroidery design will do!
- embroidery floss - I use DMC brand, 6-strand floss; just gather up as many colors as you'd like
- hand embroidery needles
- embroidery hoop - big enough to allow the design you're embroidering to fit
- tracing paper - I just used the paper I use to trace my sewing pattern, but regular tracing or even tissue paper would work
- embroidery design - I found the one I used here
- scissors, marker, pins

Begin by printing off your design if you've found it online. Place the tracing paper over top and trace using a permanent, fine-tipped marker. Trim the edges of the paper down a bit if needed.
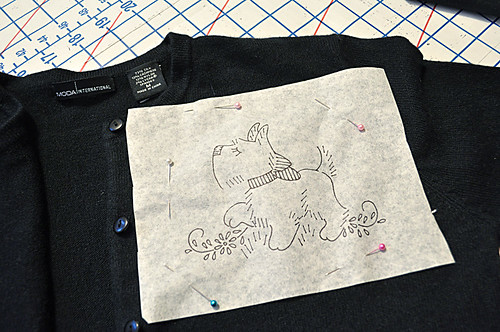
Decide on the placement of your embroidered motif (I went with the upper, left front; but you could do the back, sleeves, lower edge... anywhere!), and pin the tracing in place.
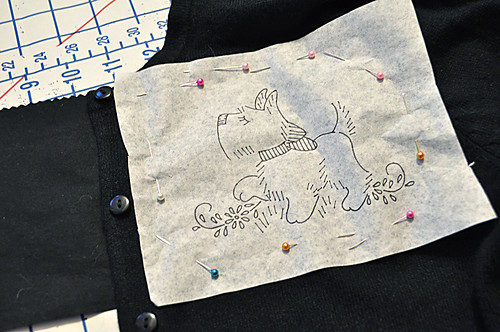
Cut a piece of the stabilizer slightly bigger than your embroidery area. Slide underneath the sweater, sandwiching the sweater between the stabilizer and tissue paper (on top). Pin in place.
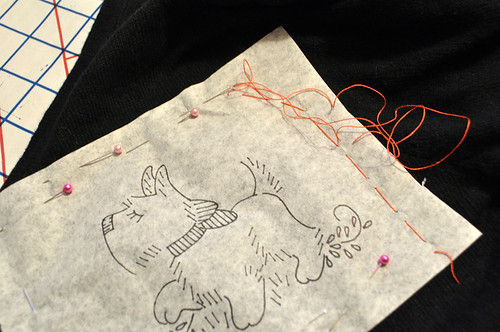
Using a single strand of embroidery thread, run a line of uneven basting stitches around the edge of the paper, catching it to the sweater underneath. (Just be sure to not catch the backside of the sweater! I find working with it opened up or my hand underneath prevents this.) Remove the pins.
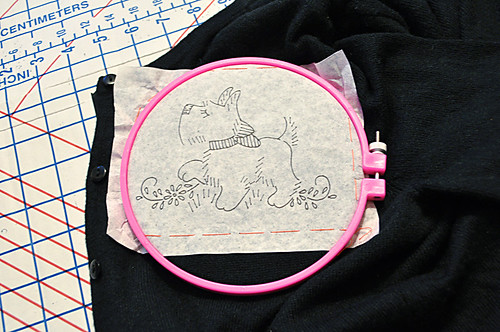
Place the non-adjustable hoop underneath the design and the adjustable piece overtop. Tighten so the embroidery area is taut and held in place.
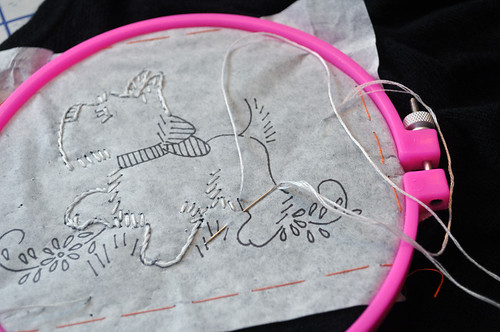
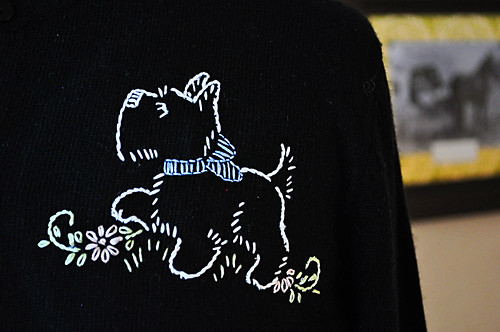
Begin outlining your design (a good piece on how to start and finish the embroidery is here). I decided to just use outline stitches on mine--no filler stitches (like a satin stitch). For a good list of embroidery stitches, see . For this particular design I decided to outline in a stem stitch with three strands of floss. I used white for the Scottie, and various pastel shades for the bow, grass and floral motifs. There are a myriad of great stitch references online: Stitch School, Sublime Stitching and Needlecrafter.
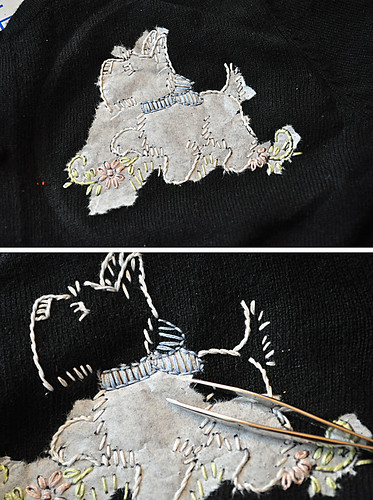
Once you have completed your design, secure all your thread ends and remove the embroidery hoop and temporary basting stitches. Gently tear away the larger pieces of the tracing paper. Use a needle and tweezers to remove any smaller bits. It's a bit tedious at this point.
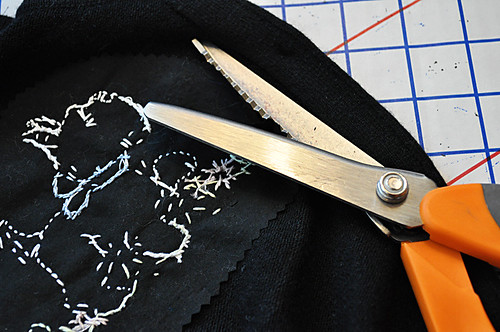
On the inside of your sweater, trim the stabilizer fabric to within 3/4" or so of the design. I pinked the edges of my fabric so it wouldn't fray as readily.
Enjoy sporting your newly embroidered sweater! Below are a handful of compilation websites for free embroidery patterns:
Here are some other vintage embroidery motifs that caught my eye as great sweater-embroidery possibilities:
Comments
Post a Comment
Thank you so much for taking time to comment! I LOVE hearing feedback from readers. I welcome truly constructive and thoughtful critique and suggestions, but will not hesitate to delete spam or downright rude comments.