diy: the bow belt

I’m sure you’ve gotten sick and tired of seeing this belt pop up in outfit photos--I wear it so often! It’s a lucky find from an estate sale last year, and quickly became my go-to belt. I am a complete sucker for tailored bows anyway. The downside is, that it’s at least 45-50 years old, and starting to show it’s age. One of the holes has ripped and it was really on it’s last legs during the 30x30 challenge. But I couldn’t just loose one of my favorite belts! So I set out to recreate it—that’s right. I made another one. Not patent like the original (just because I couldn’t find a decent patent faux leather), but close enough. I also had enough foresight to document how I did it (mostly for my own reference), but thought I’d make it into a full-blown tutorial to share with you all.

- 1/4 yard lightweight (not too stiff) faux leather 60" wide (or real leather, but keep in mind these directions refer to faux)
- Sewing machine needles compatible with the leather
- 1” pronged belt buckle (I took mine from a thrifted belt)
- Leather punch or awl
- E6000 glue or similar heavy-duty adhesive
- Paperclips
- Scissors, ruler, black permanent marker (or a color close to your material)

Begin by measuring your waist and add 6” to that. Draw two rectangles on the wrong side of the faux leather the waist+6” measurement by 1” tall. Shape one end if you desire to allow for a pointed or rounded tab.
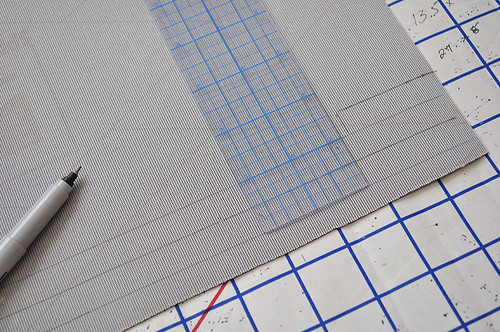
Draw two additional rectangles 19” by 1/2”, and another 2” by 1/2”. If your faux leather is pliable and light enough, you can cut out the long strips so one long edge remains attached to the other. This means you’ll just have to fold the wrong sides together and not worry about lining up both long edges. Otherwise just cut around each piece as you normally would.
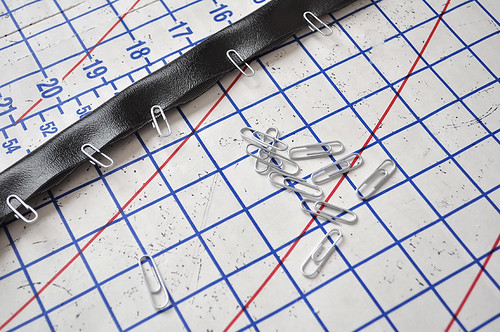
Fold in half (or line up) the longest piece along the long connected edge. Using the paperclips, clip the edges together making sure you match the edges as best you can.

With your sewing machine set up to sew heavier material (refer to your manual for information on appropriate tension and needle), sew around the edges about 1/16” to 1/8” away from the edge. Just be sure to remove those paperclips as you sew! Start and stop at the short, unshaped edge. Backtrack or tie the threads off.
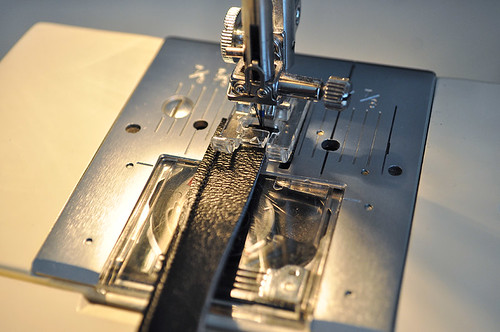
Repeat for the other two (shorter and narrower) strips. You should now have three pieces: the main belt, the bow strip and the short rectangle (bow center).
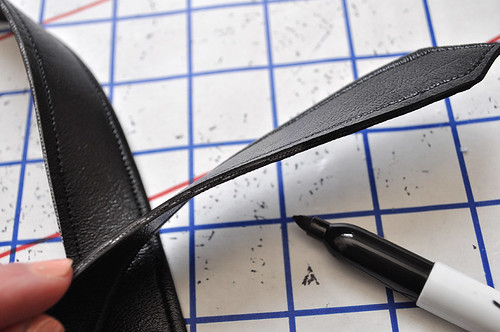
Using the permanent marker, color along the edges of the belt if needed. My backing showed, so I had to do this. If you’re using real leather, this step isn’t necessary.
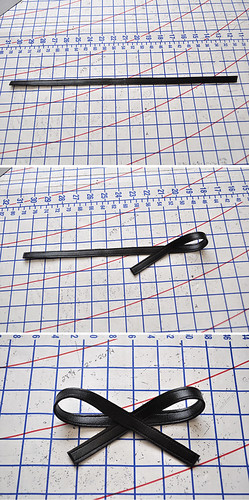
Fold the bow strip as shown above.
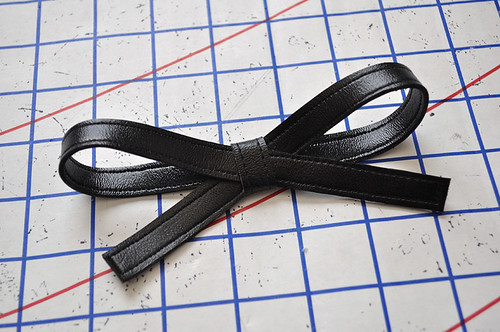
Wrap the bow center piece at the cross points (note: I did a bit of decorative topstitching on the long edges of the center piece, but this isn’t necessary). Use a dab of the adhesive to secure at the back. (Note: be sure to follow the manufacturer's directions and precautions when using heavy-duty adhesives.)
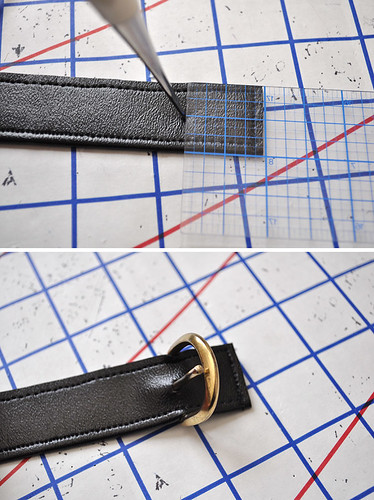
Measure in 1” from the unshaped short edge of the belt, and make a mark in the center. Use the awl to poke a hole at the mark, which you can enlarge to a slit with your scissors if you have a wider belt prong. Insert the belt buckle prong through the hole.
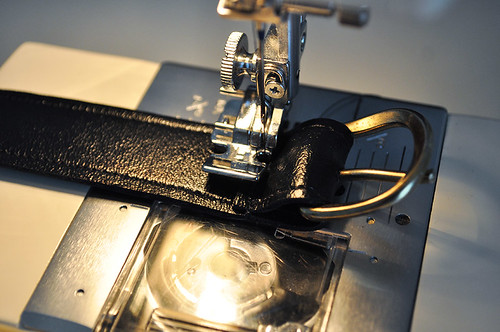
Wrap the end of the belt around the center post of the buckle to the backside of the belt. Use a paperclip to hold in place and stitch down. I stitched over this area multiple times to really secure things.

Mark the holes on the shaped end of the belt. I added a total of 5 holes; the center one being at my actual waist measurement. The others were spaced 1/2” apart. You can do them further apart if desired. I used just a bit of tailor’s chalk for this step. Punch each hole as marked. I actually was able to use a paper hole punch for this step!
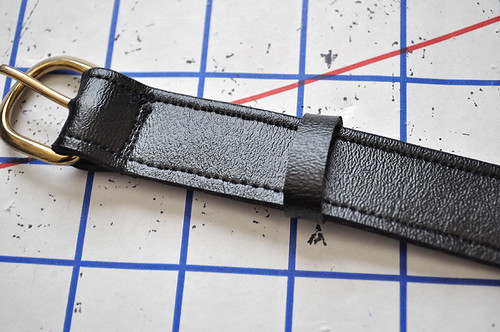
If you’d like, you can add another small strip of the leather to make a stay to hold the tail of the belt in place when it’s buckled. I used a piece that was 1/2” wide and long enough to wrap around the belt and overlap slightly at the back. You can stitch the ends together or glue in place. Slip the finished ring over the belt and down towards the buckle end.

Find the center front of the belt (from that actual-waist hole to the end). Mark. Using the adhesive, glue the bow to the center front. Allow to dry completely. A clothespin is helpful to keep everything in place while the adhesive is setting.

Now you've got a swanky, vintage inspired belt! Wouldn’t this be cute in a really bright color (I’m thinking robin’s egg blue or Kelly green!)? I seriously need to find a source for more faux leather… I could have a whole wardrobe of these belts!

Comments
Post a Comment
Thank you so much for taking time to comment! I LOVE hearing feedback from readers. I welcome truly constructive and thoughtful critique and suggestions, but will not hesitate to delete spam or downright rude comments.