diy: 50s sundress tutorial - pt 1

I’m so excited that y’all are just as enthusiastic about this dress tutorial series as I am! It’s a great summer dress that I’ve already worn a lot and will probably make another before the summer is over!
A large part of the reason I documented how I made this dress is because I am often asked about pattern drafting and manipulation; I think many people are curious about it. I’m largely self-taught when it comes to pattern drafting, but manipulating a basic pattern is so simple--and I have certainly spent enough time over the years with my nose buried in books to know it's a lot easier than I think many believe. It’s certainly something that almost any level sewist can tackle, and also opens up a whole new door to creative exploration within sewing.

To begin with, you’ll need a base pattern. I just started with a vintage 50s Butterick fitting shell; essentially a dart-fitted bodice with a waistline seam and slim skirt. If you have a similar pattern (Vogue, McCall and Butterick all sell modern versions) or a sloper (Burda Style has one available; alternatively you can draft your own), you can start with those. If not, you’ll want to find a pattern that has a simple dart-fitted bodice with a high round neckline, and waistline seam that sits at the natural waist. It can just have two darts in the front and the back, or more for even more fit. The key is to use a pattern that fits you well. If in doubt, make a muslin of the basic bodice before you start on this project—it’ll save a lot of headaches down the road!
You’ll also need the following: pattern drafting paper (banner paper or large sheets of tracing paper work well too; I use medical table paper), rulers (straight and hip-curve), markers/pencils, paper scissors, tape, pattern weights. (I’ll discuss fabric and notions in part two.)
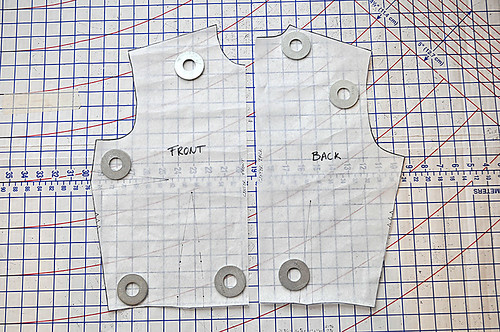
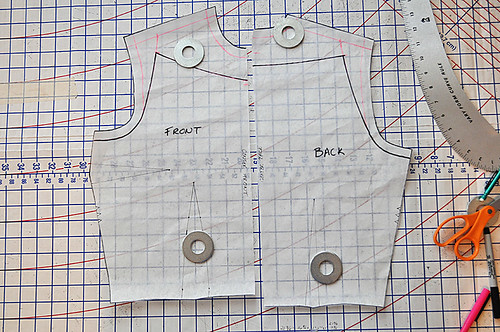
To draft the bodice: Start by tracing the front and back of your pattern pieces, including all the darts and appropriate markings.
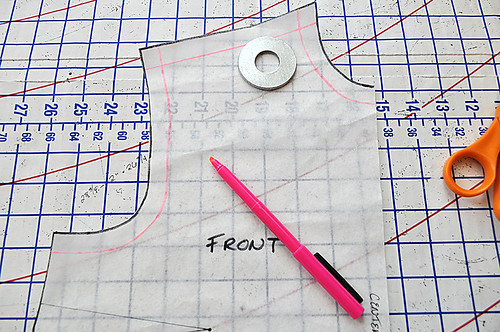
Mark seam allowances along the front neckline, shoulder and armhole as shown above (pink lines).
(Note: The following measurements for adjusting the neckline may vary for you.) Make a mark 2” from the outer edge of the shoulder line.
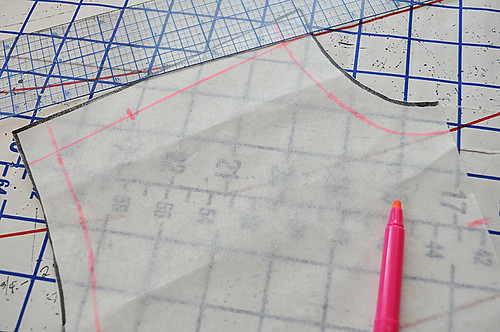
Connect the underarm curve to the mark you made on the shoulder with a curved ruler; start the connecting line just after the underarm curve.
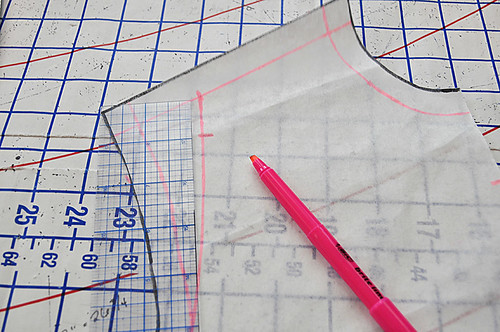
Along the armhole line you just made, measure down from the shoulder seamline 1”. Along the center front measure down 2 1/2” inches and mark (more if you want a deeper scoop to the neckline).
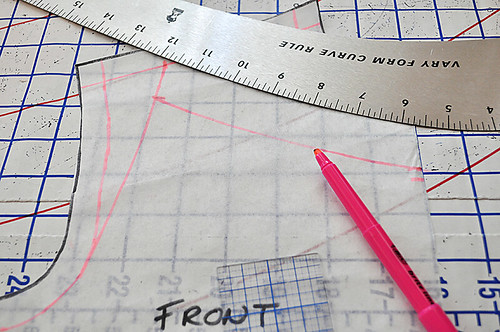
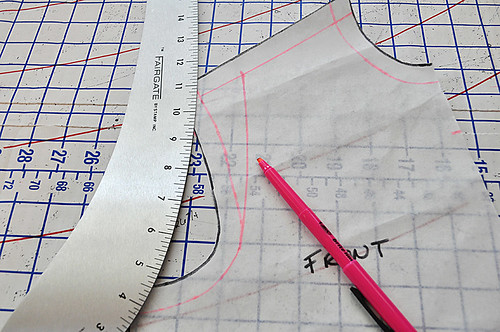
Using the curved ruler connect the mark along the armhole to the center front mark to create the new neckline.
Repeat on the back all the front adjustments for the neckline and armhole. Add 5/8” along the center back if your bodice doesn’t have a center back seam already, as we’ll be adding a zipper to the center back during dress construction.
To draft the skirt: This skirt sports a very easy gathered style—perfect for a beginner to tackle! Determine your skirt length. I wanted a slightly-shorter skirt that hit at the bottom of my knees. For me this was 23”. Add 3” to this length (5/8” for waistline seam and 2 3/8” for hem).
Measure your hips, multiply this measure by 3 and then divide by two (if you want two side seams for pockets. Otherwise, you can just cut the skirt all one length with a center back seam). For example, if your hips are 38”x3=114” / 2=57”. One of these pieces will be for the back and split in half again. So you’ll need to cut one piece 57” wide by your desired skirt length, and then two 29” (I just rounded up the number) by the skirt length.
Draft the skirt pockets. I opted to do in-seam pockets, but patch pockets would work too. You can see my technique for drafting these here (scroll down for the in-seam pockets). Alternatively, you could also do patch pockets (I won’t be covering these in construction though.)
Check the fit: Unless you're using a bodice you've previously fitted to yourself (heck, even if you are--it's just a good idea!), I'd highly recommend making a quick muslin to check the fit, dart placement and the neckline height. It's a bit tricky without the shoulder ties, but just pin it to your bra straps while fitted and you should be fine!
Stay tuned for part two! All the construction steps will be up Friday...


Comments
Post a Comment
Thank you so much for taking time to comment! I LOVE hearing feedback from readers. I welcome truly constructive and thoughtful critique and suggestions, but will not hesitate to delete spam or downright rude comments.