
This is perhaps the trickiest part of the entire dress--the shoulder yoke. Believe me: the first time I made this dress I sat around scratching my head for a bit until I figured it out and it's been a breeze to do every time I've made the dress since! I took step-by-step photos of this part of the construction, so hopefully that will help anyone having a problem with this (or if you're like me and tend to understand things better through images than words!). It's super easy--promise!

Follow step 1 and 2 for sewing the back dart and attaching the facing. Note with the facing I stitch to within the seam allowance at either edge (in this case, it's 3/4" for my muslin).
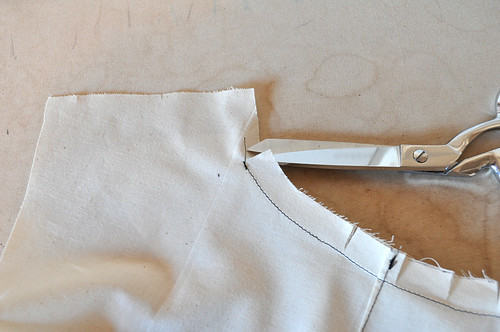
Clip the back bodice
only to the seam allowance where the neckline stitching ends (at either end). This will allow you to turn the bodice shoulder yoke edge under smoothly.

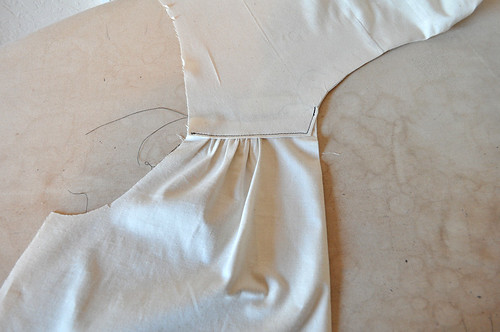
Sew two rows of gathering stitches along the upper edge of the front bodice, between the notches as indicated on the pattern.
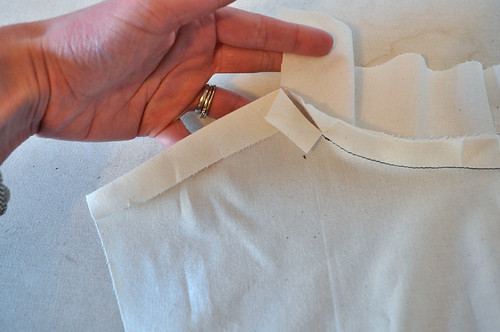
Press under the seam allowance along the shoulder yoke edge and short neckline edge to the clipped seam.
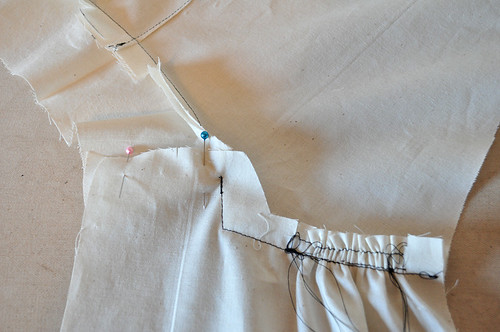
The next step is optional, but I find helpful! Use a pin to indicate where the notches are on the shoulder yoke at either end.
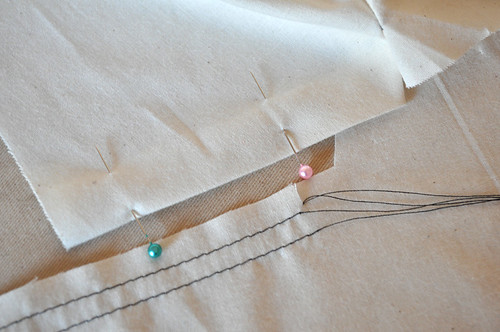
Pin the shoulder yoke to the front bodice. The neckline facing will extend towards the back neckline facing, but do not pin this edge. Pin down the short vertical, folded-under edge of the neckline yoke starting where the stitching for the back neckline/neckline facing stops (green pin). Continue pinning the longer, folded-under horizontal edge of the shoulder yoke to where the gathering stitches begin using the pins to match up with the notches on the bodice front.
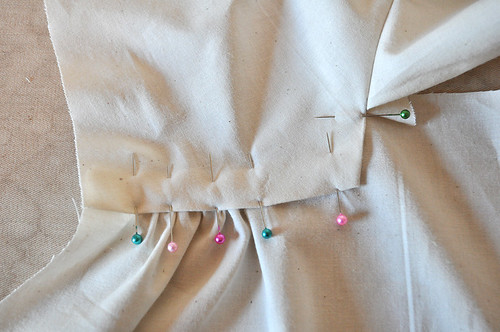
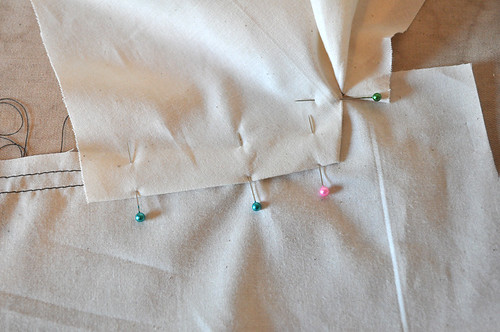
Gather the bodice front to fit and continue pinning to the armhole edge, matching notch and seams.
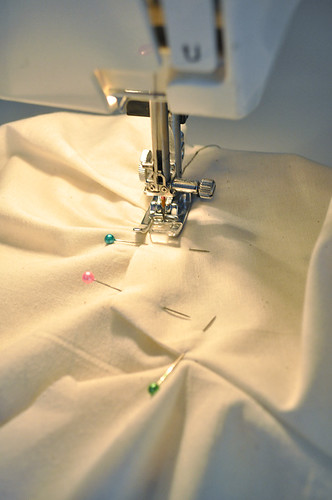
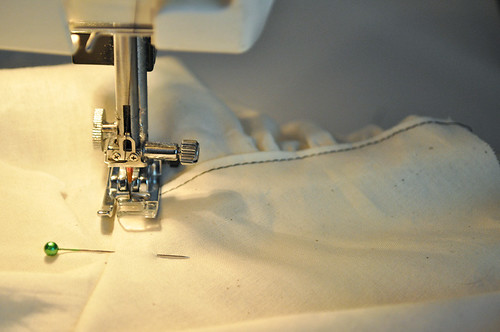
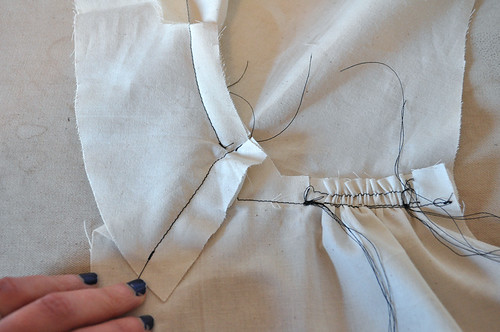
Begin topstitching the shoulder. I find it easiest to start with the longer (horizontal) edge. Pivot at the corner and continue up the short edge to the point where the back neckline/neckline facing stitching stops. Backtack or tie ends off on the inside.
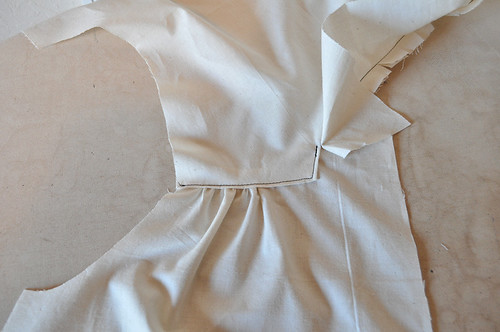
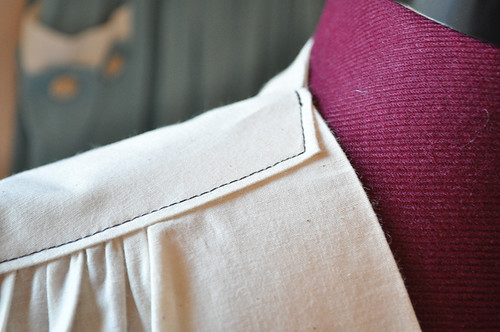
This is what your piece should look like (above).
On the inside, pin together the front bodice facing extension and the back neckline facing pieces along their short edges, matching notches.
Stitch these pieces together. Clip along the seam allowance of the back neckline and facing seam to allow the facing to easily turn to the inside and lie flat.
Fold the front facing extension to the wrong side, along the dots indicated on the pattern. Press well. Repeat for the other front bodice piece.
It looks kind of complicated, but as I said: once you do it, you'll get it! This is an advantage to doing a muslin as well--you get to practice any construction techniques that are potentially troublesome! As usual, please feel free to ask any questions and I'll do my best to get back to you!
Let's work on our muslins this week through the weekend, shall we? I'm planning on posting some pictures and a short critique of my muslin towards the end of the week and will be checking the
Flickr group daily. Can't wait to see your muslins and variation ideas!!!


Comments
Post a Comment
Thank you so much for taking time to comment! I LOVE hearing feedback from readers. I welcome truly constructive and thoughtful critique and suggestions, but will not hesitate to delete spam or downright rude comments.