
It's getting so exciting--we're just about ready to start cutting the fashion fabric*! One thing I would like address before we get started is the side seam allowances. The pattern calls for 1/2" wide seams, and while this is doable particularly if you are using an invisible zipper (though still a squeeze!), I have found that adopting the vintage method of extending my side seams to 3/4" works a lot better. I would do this to the skirt side seams, bodice and midriff pieces (just the side seams--no need to have super wide seams on all the other edges!). This is especially necessary if you plan on inserting a placket-style zipper (which I will be posting about!), since it requires a bit more fabric to work with. (But, if you've already cut out the dress with 1/2" seams, don't worry--you can always extend those seams with some extra fabric.) So if you want to do this, now is the time to adjust your pattern as necessary (I just tape on a bit of extra paper to extend the seams an additional 1/4").
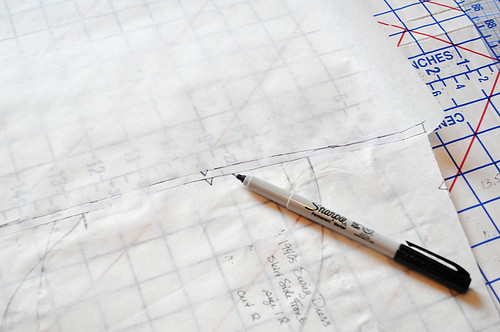 |
| Adding the new side seam allowance to make it 3/4" instead of 1/2" wide. |
But first: how do you transfer all those changes you made to the muslin onto your paper pattern? It sounds a bit tricky, but I promise you it really isn't. You have two options in regards to how you approach this.

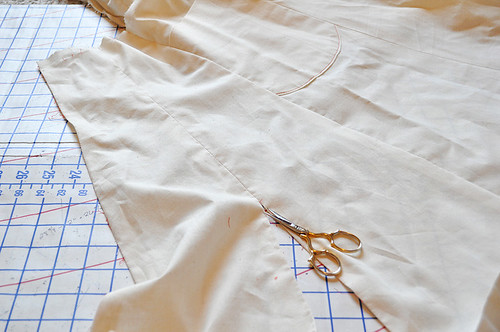 |
| Unpicking the muslin. Unless you made different changes to each side of
the pattern, you only need to use one half of the muslin. |
Use your muslin as a pattern. If you've made significant changes to your muslin, this might be the way to go. Simply unpick your basting stitches, marking your final stitching line on the muslin as you go. Press all the pieces flat and lay on your cutting surface. Measure from the stitching line to the edge, marking the new seam allowance (the pattern calls for 1/2"). Trim the muslin down to this seam allowance as needed. Of course the downside of this is if you have to add additional width/length to your final pattern; in that case I'd recommend going with one of the other options below.
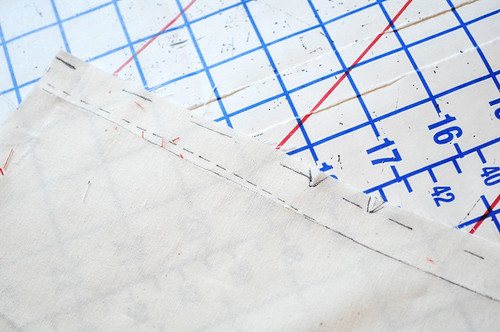 |
| The old seam line (solid), new seamline (small dashes), and new cutting
line that takes into account the seam allowance (large dashes). Be sure
to remark those notches if you're using your muslin as a pattern! |
You can now treat that muslin as a pattern piece; just be sure to transfer all markings and such to your fashion fabric after cutting out as you would with a paper pattern. Just be careful not to pull the muslin around so it throws the original shape of the pattern piece off (since fabric is obviously more flexible and prone to distortion than paper).
Bonus: because using muslin has a bit of "grip" to it, your pattern pieces won't slide around as much on your fashion fabric!
 |
| Reducing the curve under the bust gathers on my bodice front piece. I
measured the length and width that I pinned out on the muslin, marked
this on my paper pattern, and cut it off. Easy! |
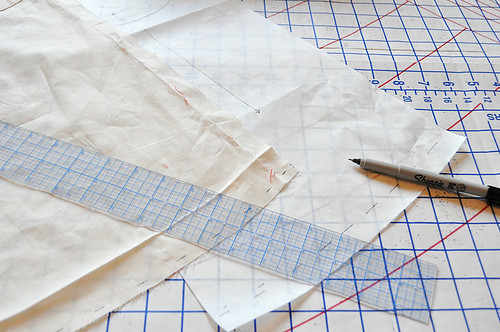
Transfer all changes to your paper pattern. This is a great option if you don't have
major changes, although you can still do this if you have quite a few--it may just take awhile. There are two ways I approach this. The first is to measure and mark the amount I need to let out/take in on the muslin, and then go to my paper pattern and mark this new line as well. This works well if you have a short space or "landmark" on the pattern so the difference gets marked from the muslin to the paper evenly.
 |
| Adjusting the hem. |
The other option it to unpick your muslin, marking adjustments with a marker as you go. Iron any wrinkles and seam-folds out of the pieces, and lay your pattern overtop to mark any changes. This is a great option for changes that may be a little more involved to mark.
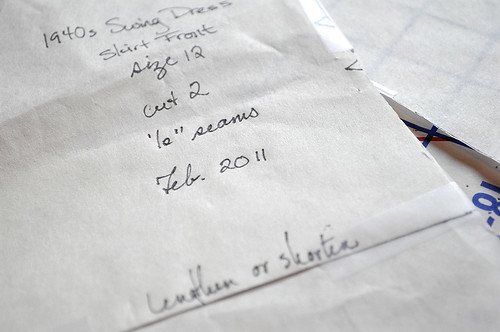 |
| A good idea is to mark on the pattern pieces/muslin the month and year
that you fit this. If you want to make this design again in the future,
you know whether you'll need to check for fit again or not (I usually
only do this if my weight has fluctuated greatly). |
*So that pretty much wraps up the muslin portion of the sew-along. How does it feel to have finally finished fitting this garment? Have I converted any of you to the muslin-process or made you want to go screaming into the night? lol. I'm going to go ahead and cut out my fabric this week, and will be back Thursday with a post on seam finishes that would be appropriate for this project (with pictures and samples!). Then on Monday we'll officially start construction of the dress (though you are more than welcome to jump ahead of course!). The real fun begins now!!! Here's a little checklist of things to remember while cutting the garment fabric:
- Garment Fabric: be sure to follow the grainlines carefully on the pattern and use the cutting layout as a guideline for how to treat your placement of pattern pieces. Cut all pieces, including facings and pockets if you decided to go with them.
- Interfacing: cut the interfacing for the midriff piece as well as the back neckline facing (this is optional, but I find helps).
- Underlining: if your fabric is lightweight and you wish you underline it, cut all pieces out of the underlining material as well (except for pockets and the back neckline facing). The underlining is basted to the fabric and then treated as one piece. I'll touch on this a bit more later in the week.


Comments
Post a Comment
Thank you so much for taking time to comment! I LOVE hearing feedback from readers. I welcome truly constructive and thoughtful critique and suggestions, but will not hesitate to delete spam or downright rude comments.